
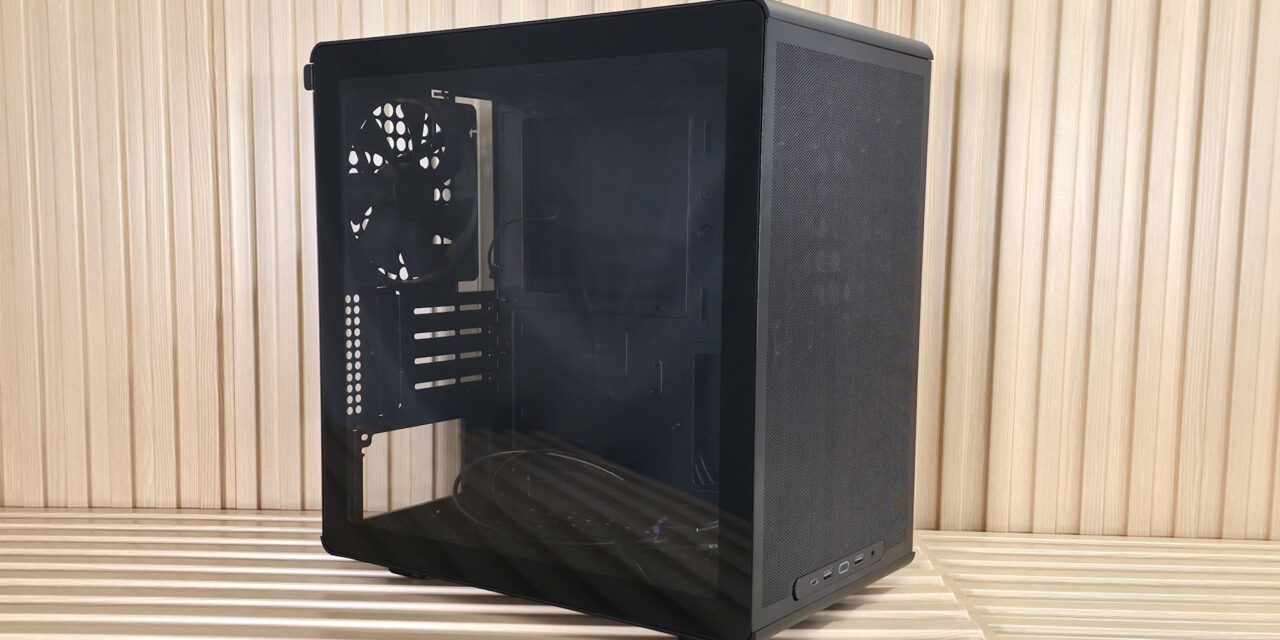
Cooler Master Q300L v3 MicroATX case review: Sub-$45 MSRP offers incredible value for MicroATX chassis with included fans
Cooler Master’s Q300 series of budget-friendly, compact Micro ATX/Mini-ITX cases started in 2018 and aimed at first-time builders on a budget. It came in multiple flavors, such as the Q300L (with distinctive patterned dust filters) and the Q300P, which added extra panels, RGB lighting, and handles. In 2023, the Q300L V2 was released, swapping out the acrylic panel for glass and adding a fast 20 Gbps USB Type-C port among other things. Fast forward to today: the company recently released the Q300L V3, with a bigger overhaul than the first versions, increasing its size slightly, enlarging the panel perforations, reinforcing the structure, and adding flexible front IO placement.
Even with all the new features, the Q300L V3 is the ‘Lite’ version of the Qube 340 (which includes handles) and remains very affordable, with an MSRP of $44.90. However, you can currently find it on Amazon for even less, under $40, at the time of publishing. The updated Q300L and its slightly larger frame aim to offer increased airflow through enlarged panel perforations, more space for the CPU and graphics card, and continued vertical or horizontal orientation options so you can tailor the build to fit any space. It also includes one 140mm fan. As far as looks go, not a lot has changed, but for a sub-$45 chassis with tempered glass, you won’t mind showing it off.
We’ll cover many more details inside and outside the case, showcasing the features and any issues we may encounter during the build process. We’ll also run the case through thermal and noise testing to show how it performs compared to other cases and whether it has a chance of making our best PC cases list. Below are the case’s specifications from Cooler Master.
Q300L V3 Product Specifications
|
Type |
Micro ATX |
|
Dimensions (H x L x W) |
15.3 x 15.2 x 9-inches (388 x 386 x 230mm) |
|
Motherboard Support |
Mini-ITX, Micro ATX |
|
Back-connect Motherboard Support |
No |
|
Color |
Black, White |
|
Storage Support |
(1) 3.5-inch -or- (2) 2.5-inch |
|
PCIe Expansion Slots |
4 |
|
Fan Support |
Top – 2×120/140mm |
|
Pre-installed fans |
(1) 140mm DF1402512RFLN (Rear) |
|
Radiator Support |
Front – 120/240mm |
|
CPU Cooler Clearance |
178mm |
|
GPU Clearance |
366mm (w/o fan installed) |
|
Vertical GPU Support |
No |
|
PSU Length |
200mm (w/o bottom fan) |
|
Dust Filters |
Top, Front, Bottom |
|
Other features |
1x included fan |
|
MSRP |
$44.90 |
|
Warranty |
2 Years |
Features of the TG3
▶️ External Features
The Q300L V3 looks remarkably similar to the V2. The updated V3 offers similar dimensions, just a few millimeters larger all around, and keeps its flexible design, allowing vertical or horizontal orientation options. The edges of the small-form-factor chassis are now rounded instead of angled and flat like on the V2. They also moved the IO panel from the top to the bottom by default, but you can move it back to the top if you choose. Outside of that, there are hardly any noticeable changes to the appearance. But that’s not necessarily a bad thing, as it’s a good-looking, basic chassis for the price.
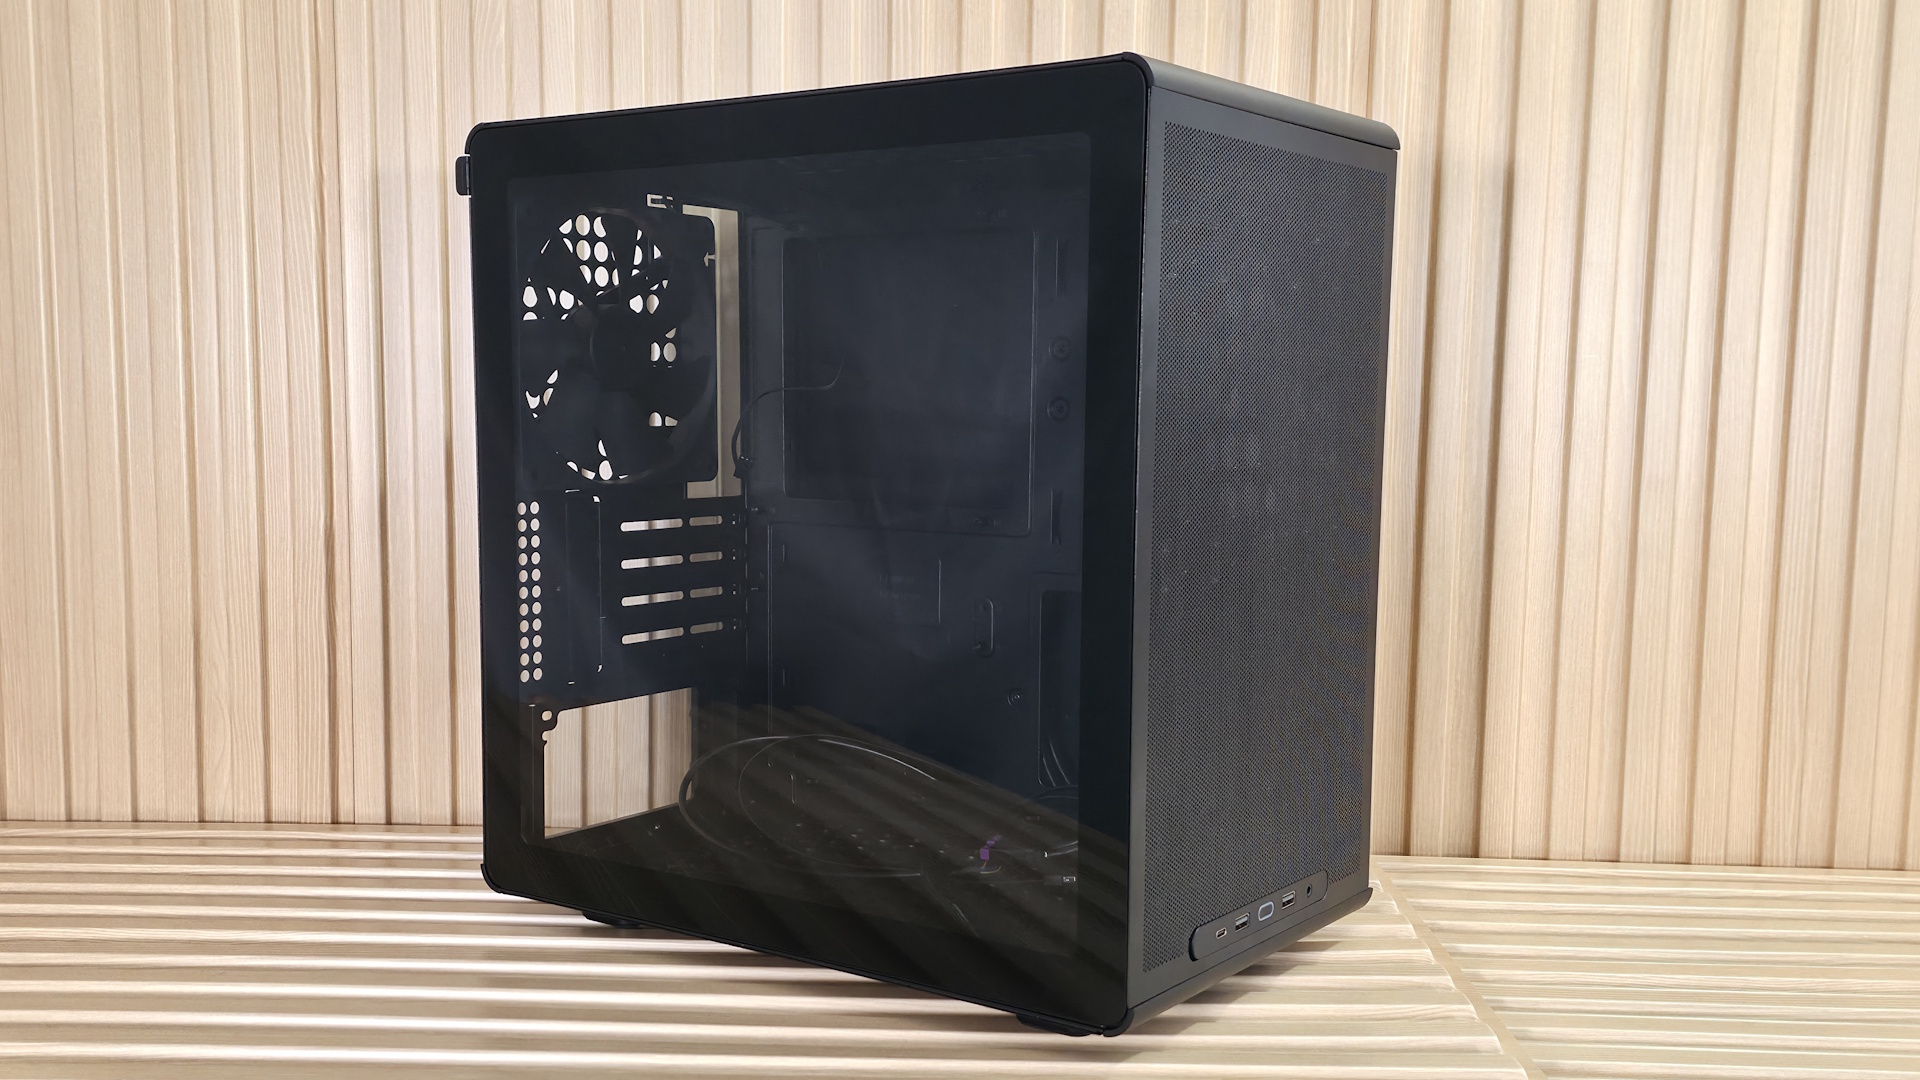
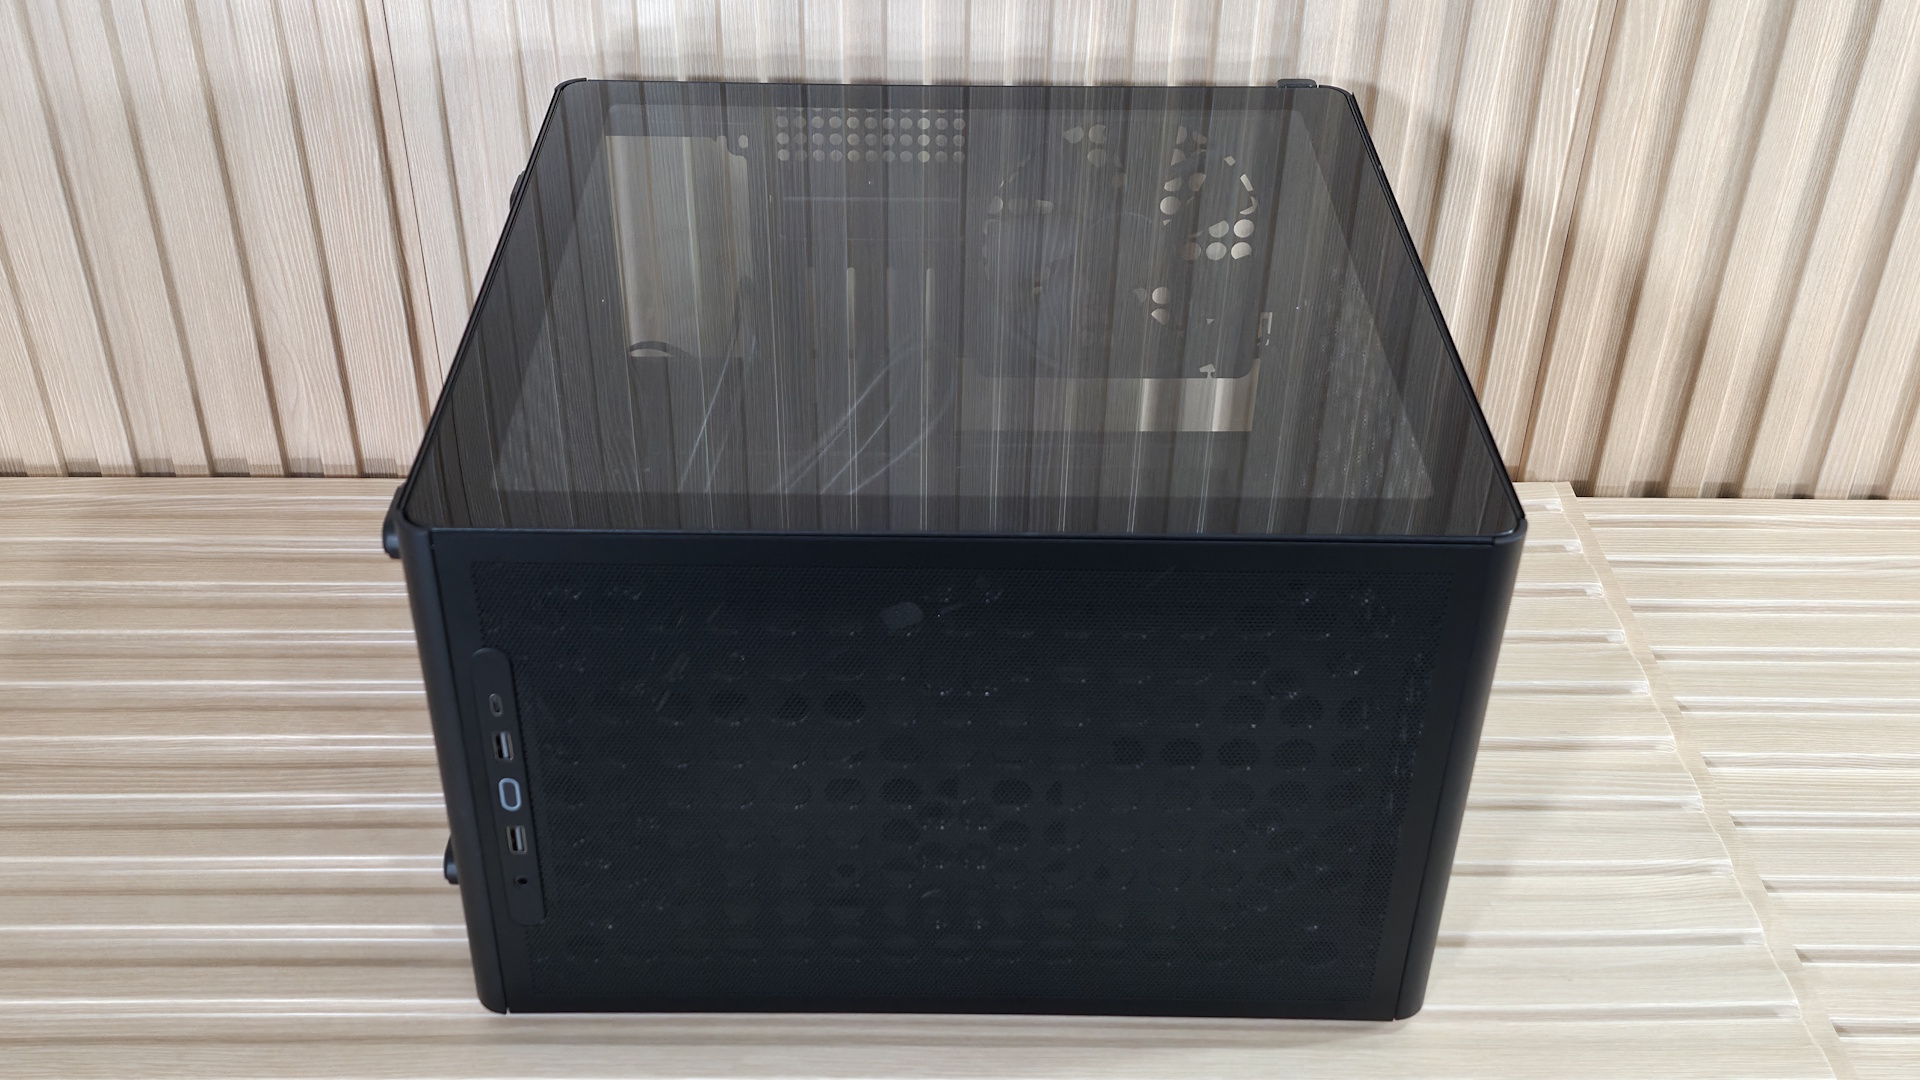
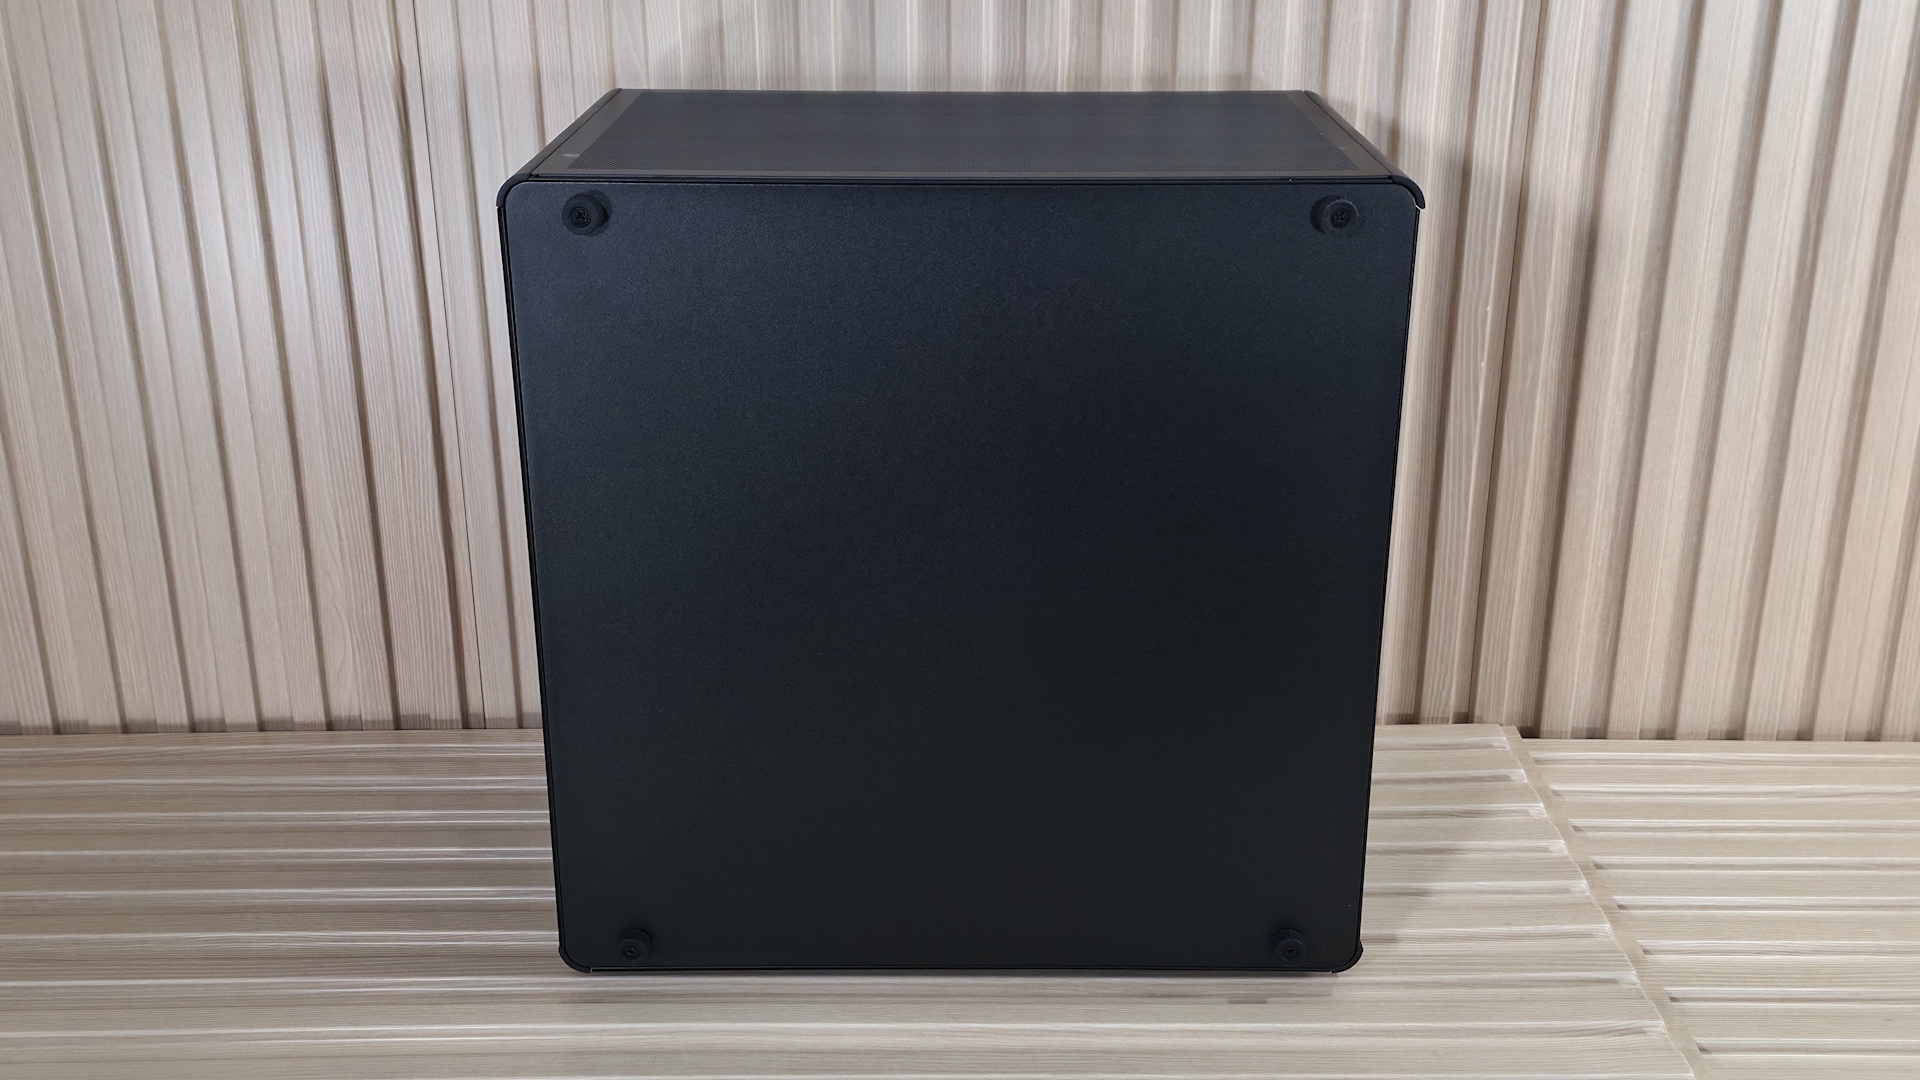
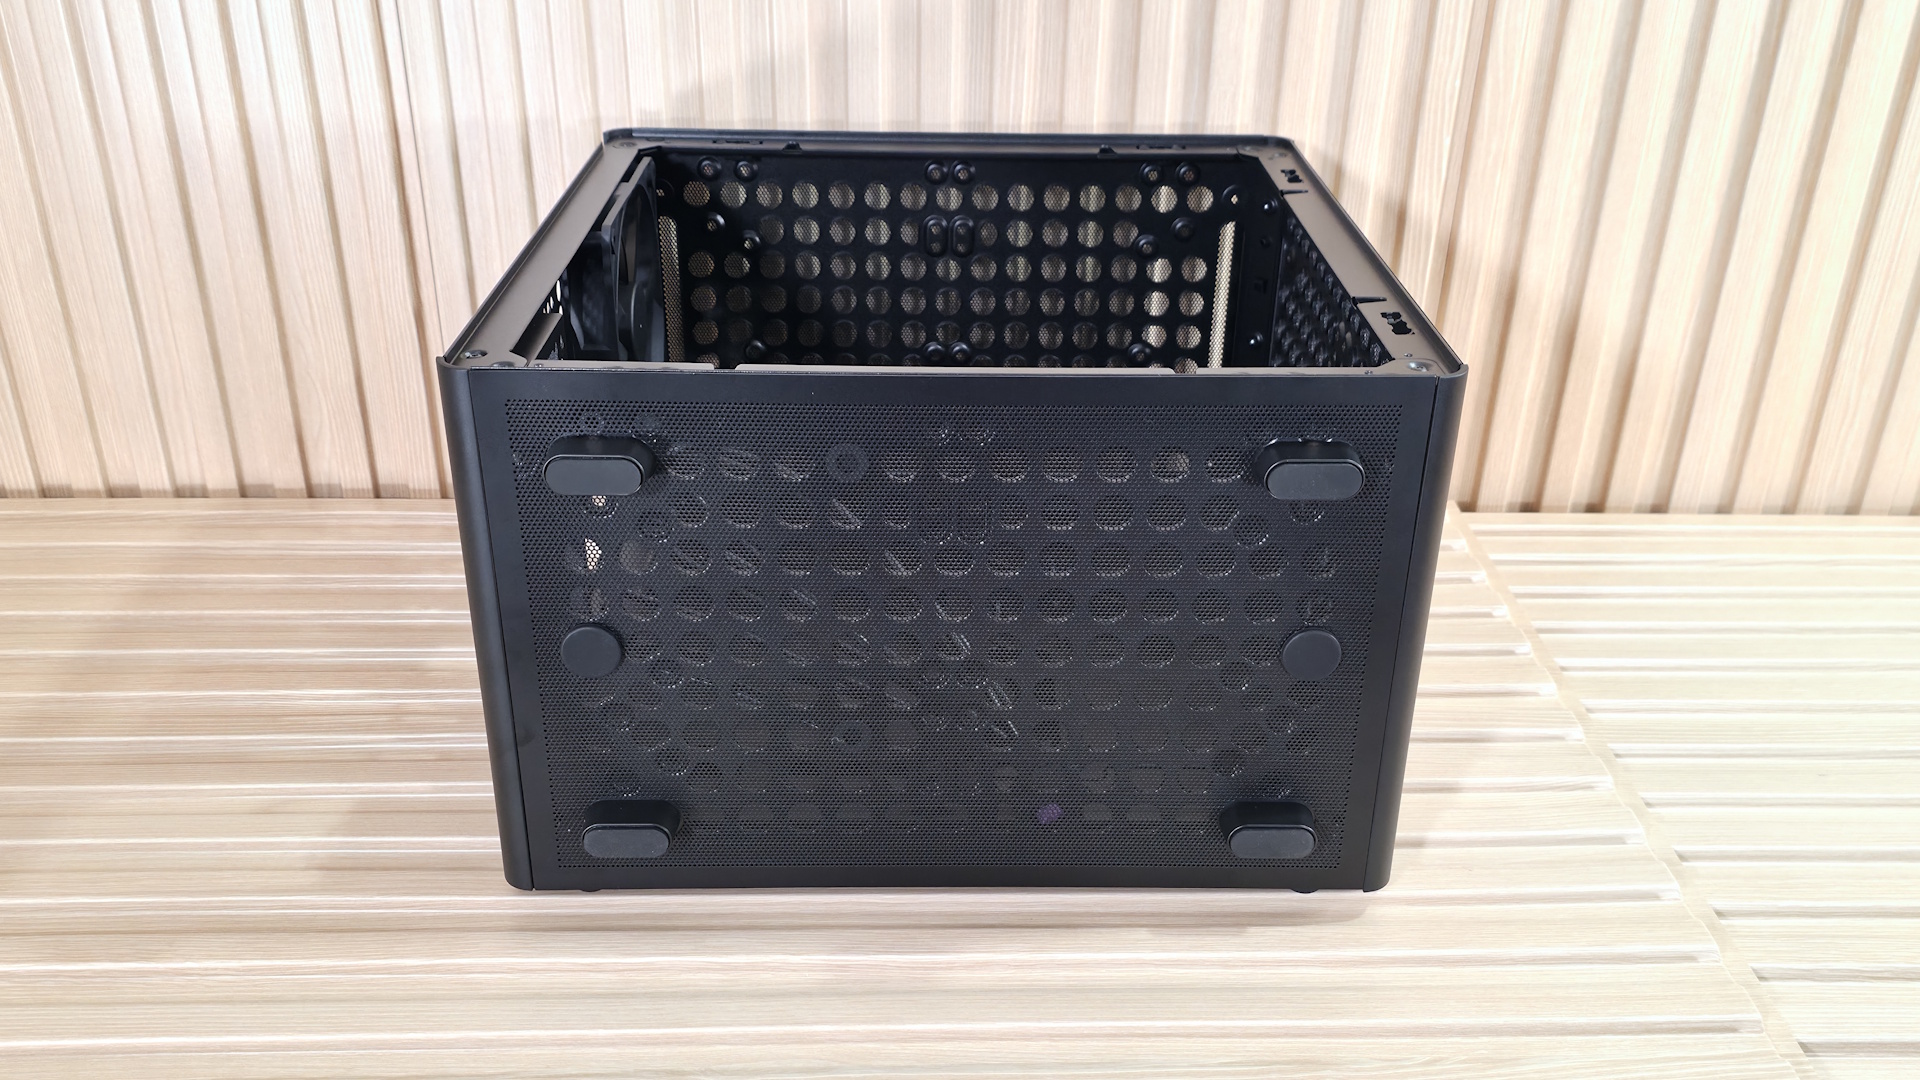
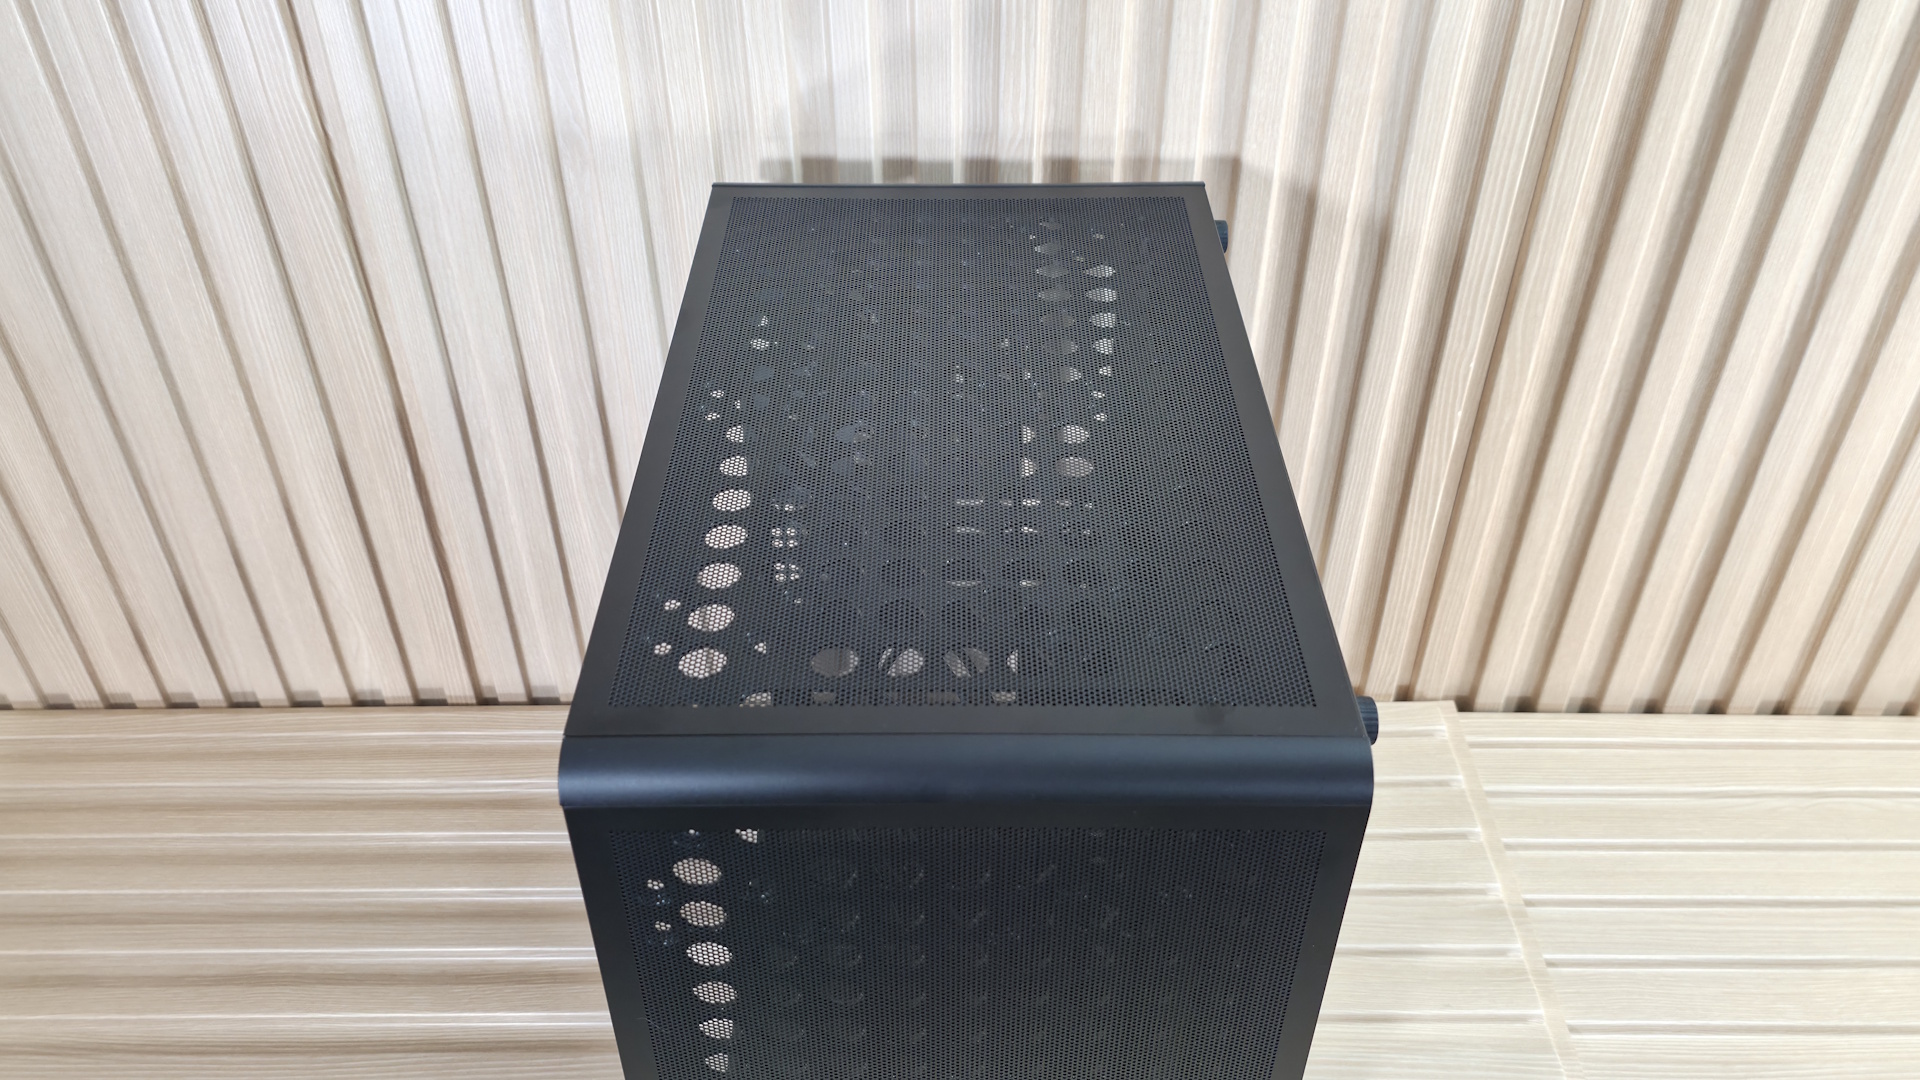
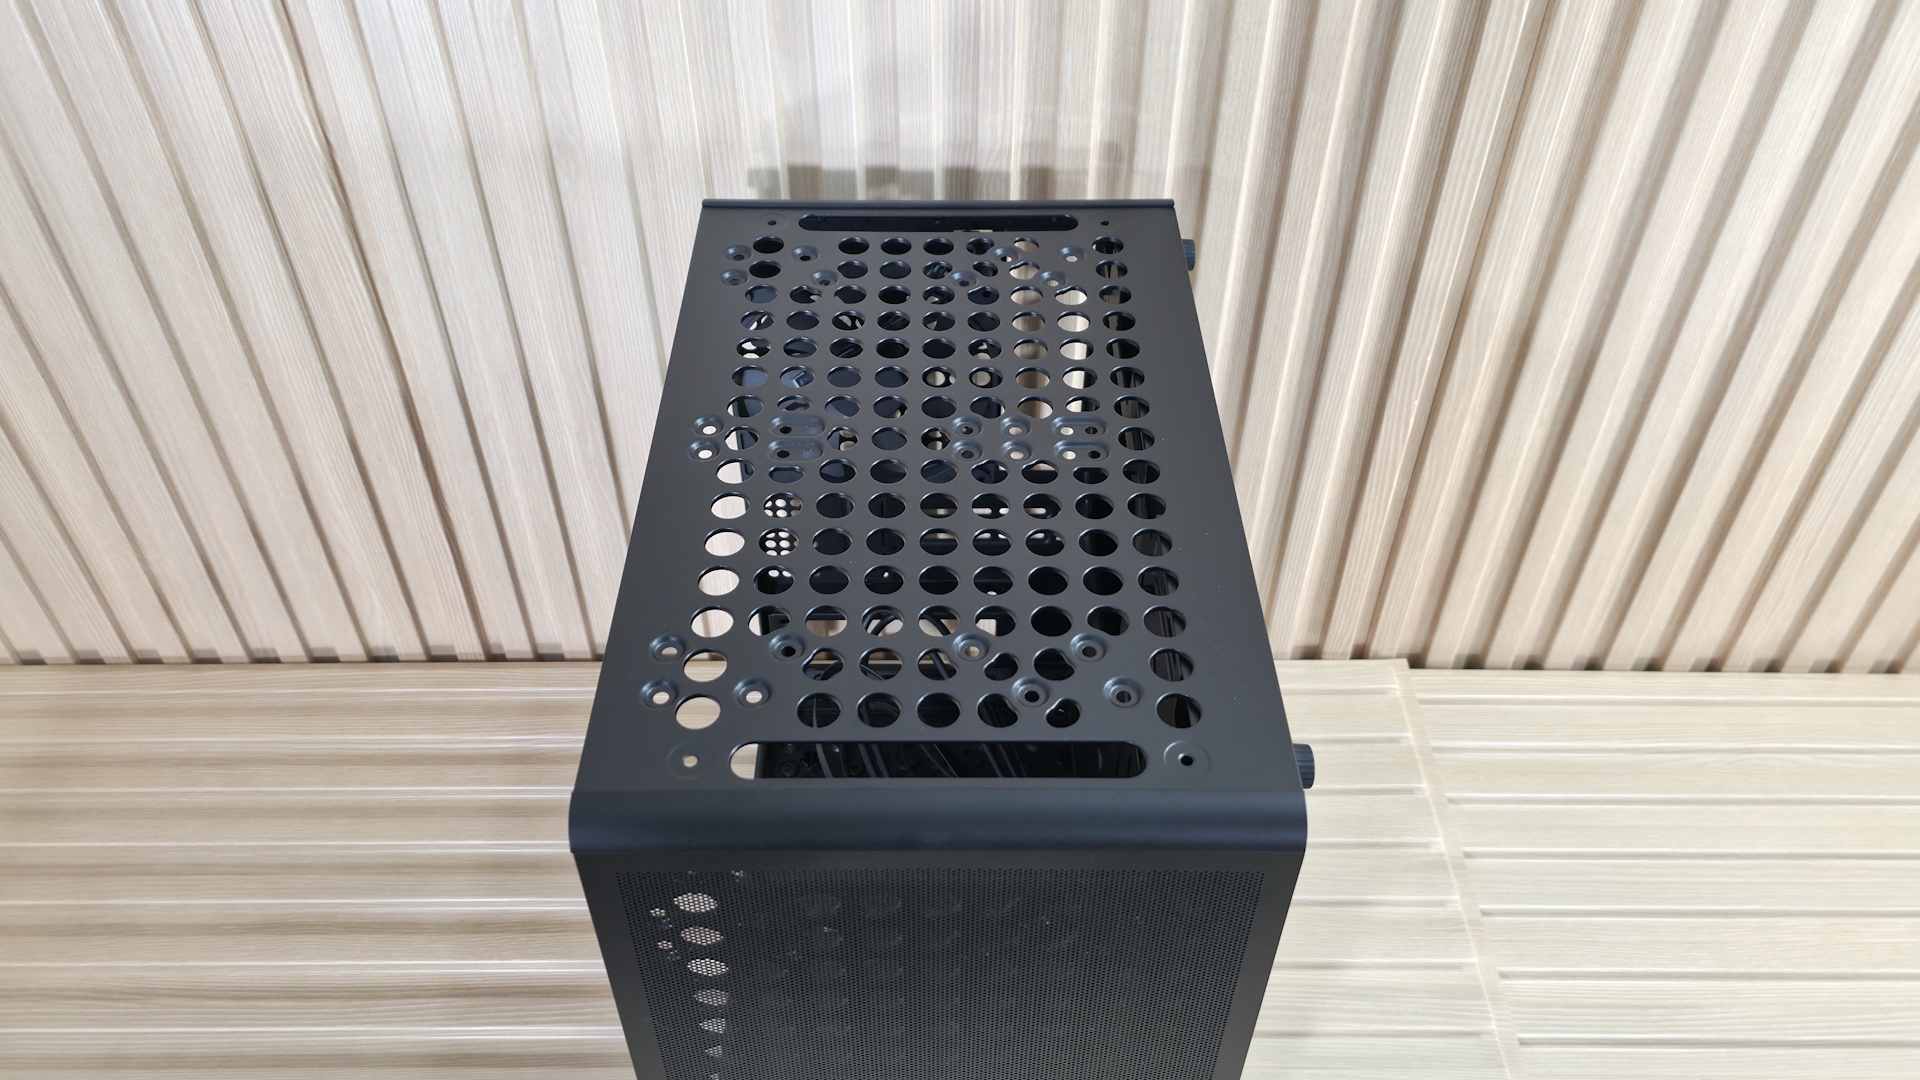
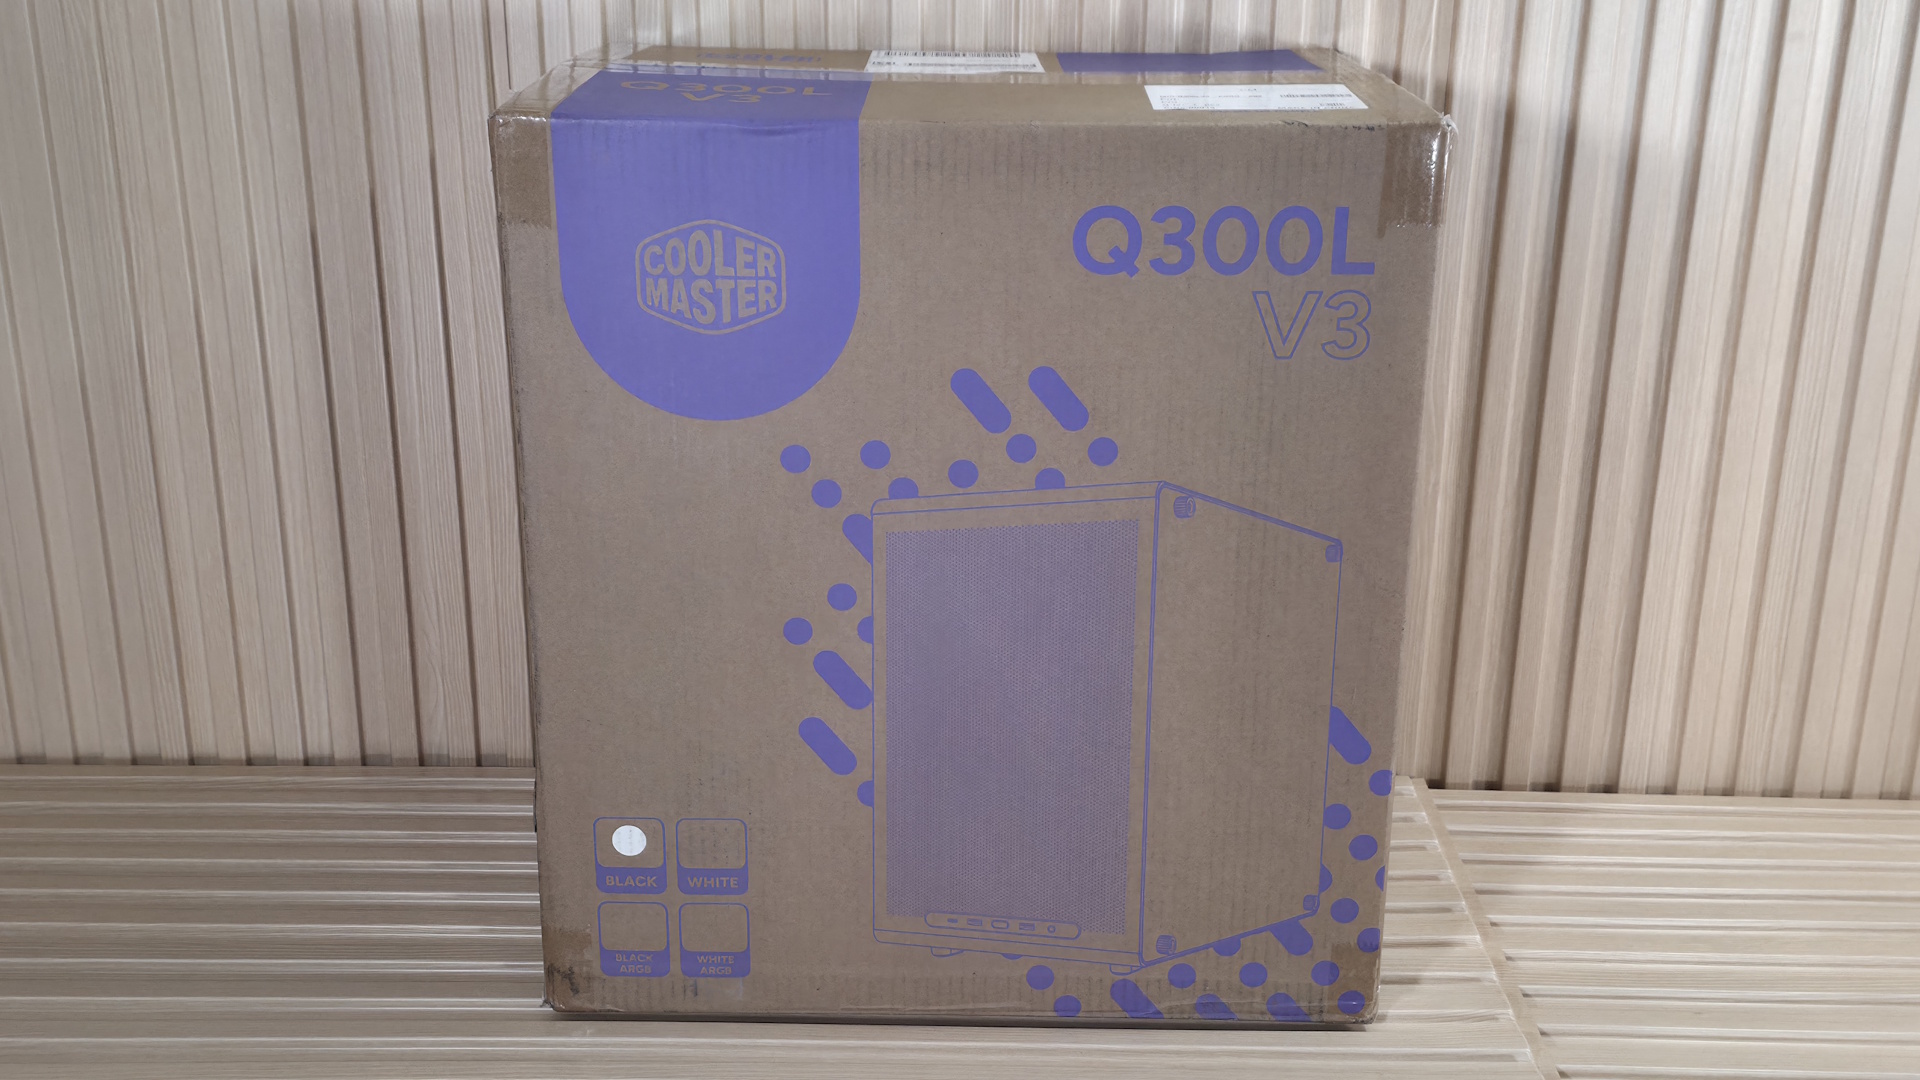
The side uses a clear tempered glass panel that slots in at the bottom and is secured on top with ball-and-socket latching mechanisms, holding it tight. Simply slot the glass in, and push on the top to secure. I like this cleaner implementation versus V2, which used four screws in the corners to hold the panel on. The other side panel is held on by four captive thumb screws in the corners, each with rubber pads to support a horizontal (window panel up) configuration.
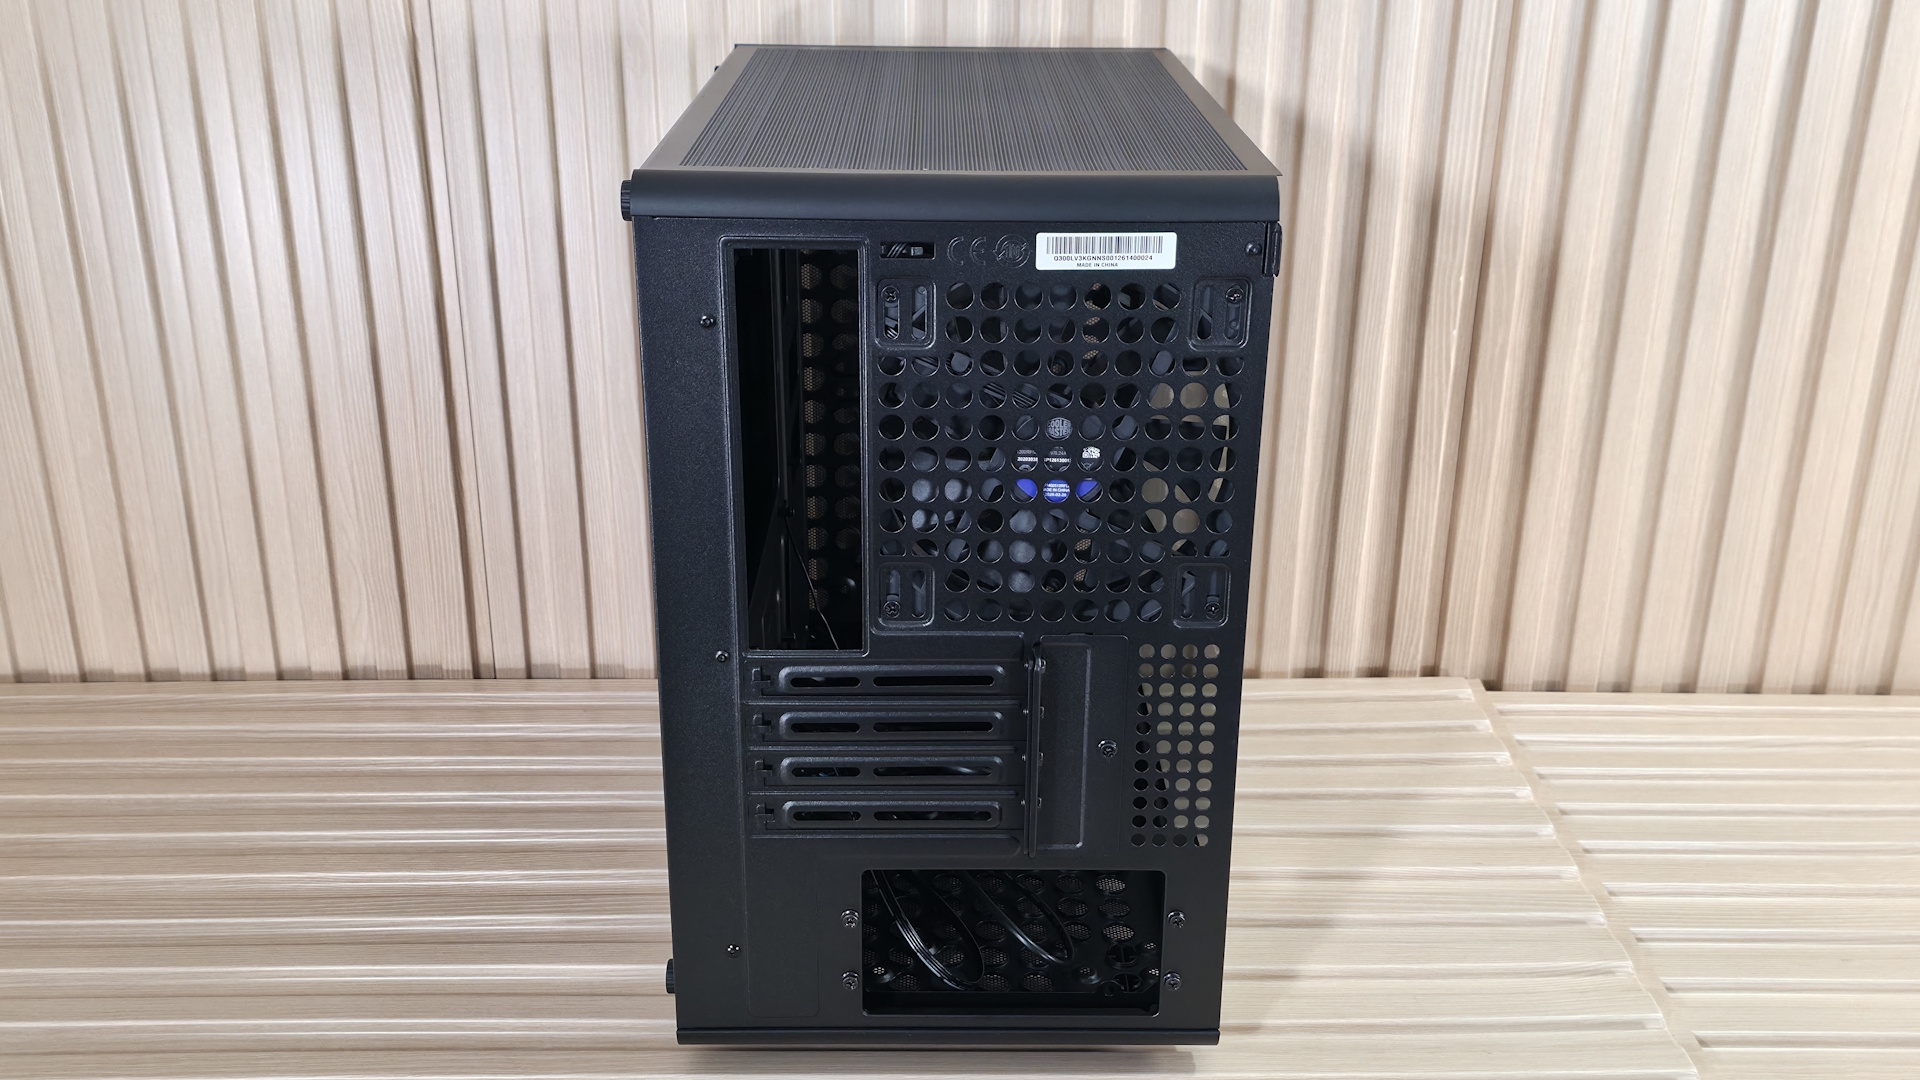
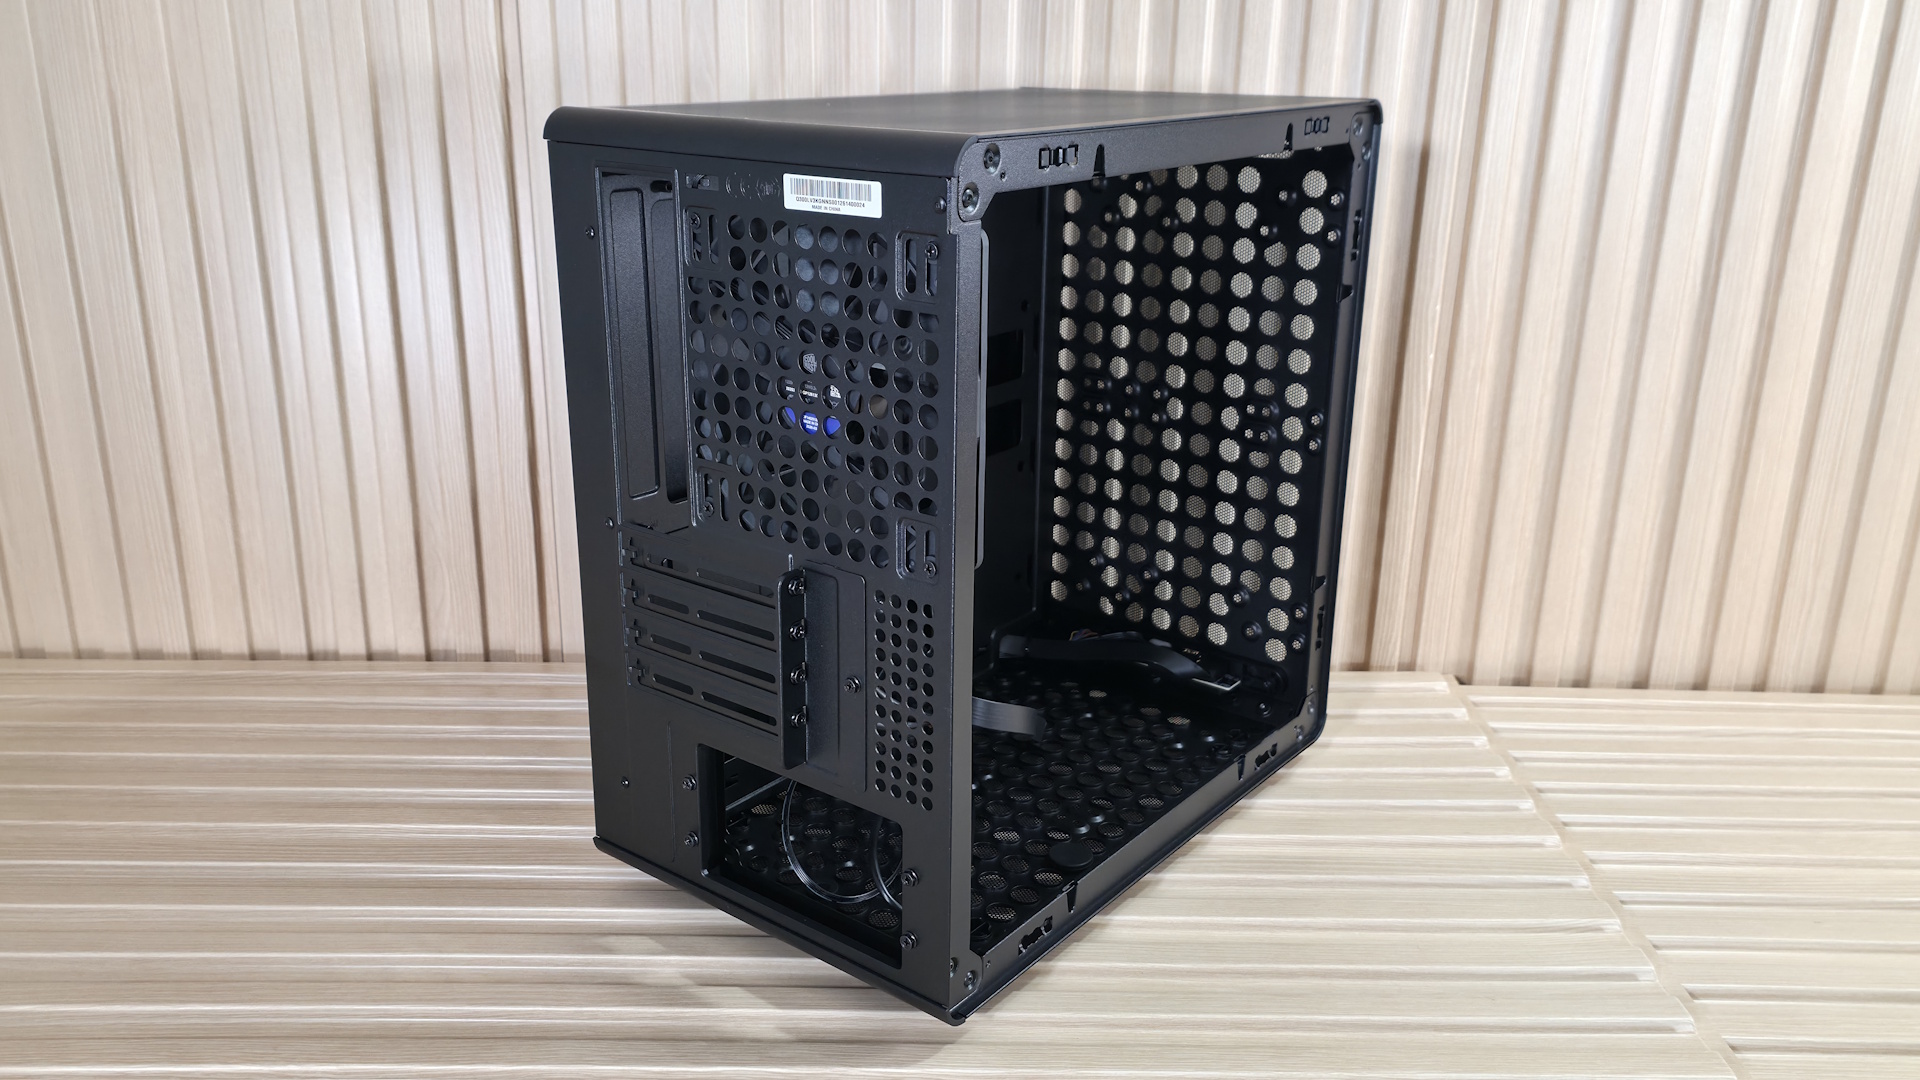
Flipping the chassis around to the rear, you get a better look at the fan location, which supports 120mm and 140mm air movers (comes with one 140mm). Below that are the four PCIe expansion slots, which can support up to 3.5-slot video cards and still give them some air to breathe. At the bottom is space for the power supply. You mount the power supply to a ‘box’ offset about an inch or so inside the case, which hides the connector portion of the power plug for a cleaner look from the (generally hidden) backside of the case. You can see it better in the internal photos below.
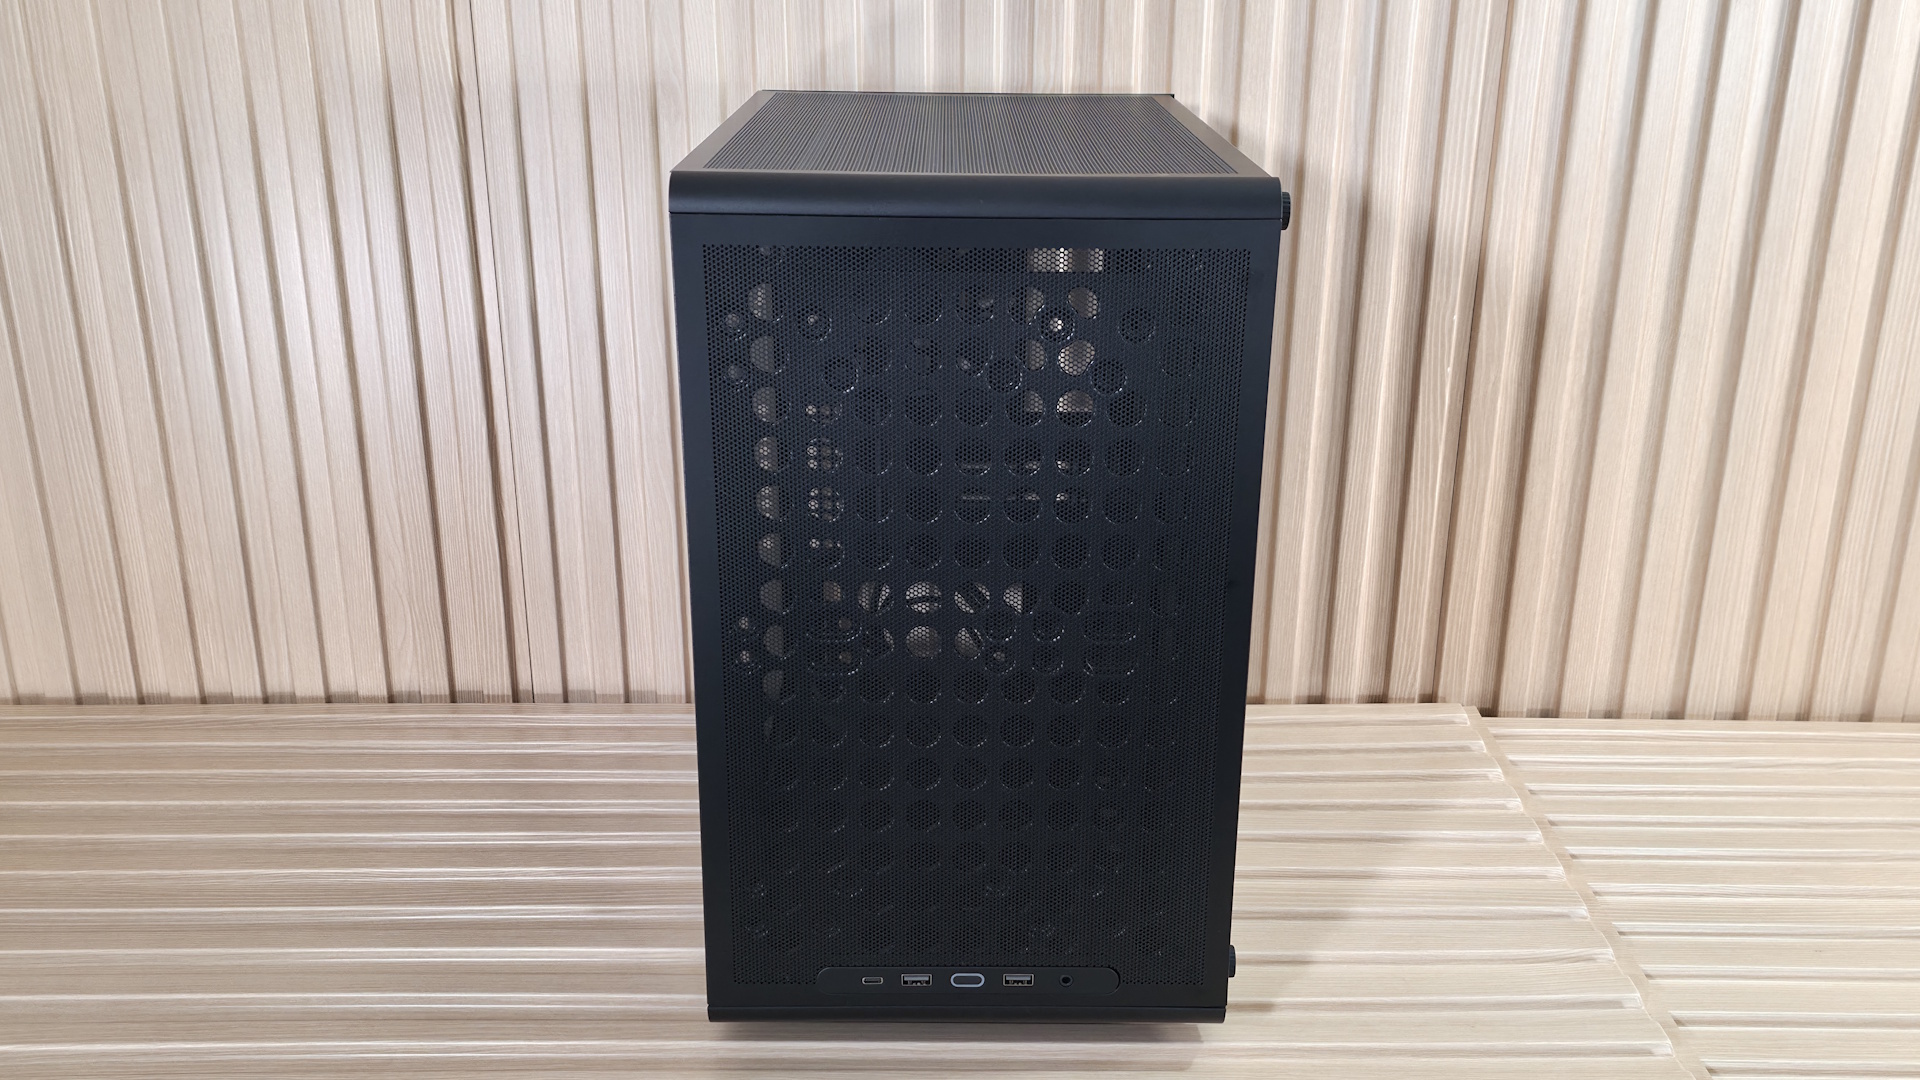
The top, front, and bottom of the case all use magnetic dust filters to keep tiny particulates out as best they can. It’s easy to clean this way, but they – specifically the top and front – can move slightly, requiring (for OCD people like me anyway) adjustments if you touch them. Cooler Master enlarged the holes on the SGCC (low-carbon steel with a protective zinc layer via a hot-dip process) frame on top and front to allow additional airflow and, in theory, better cooling performance. We don’t have the V2 to test and compare, but the new model did a good job keeping our Ryzen 9 9900X and RTX 4080 running cool.
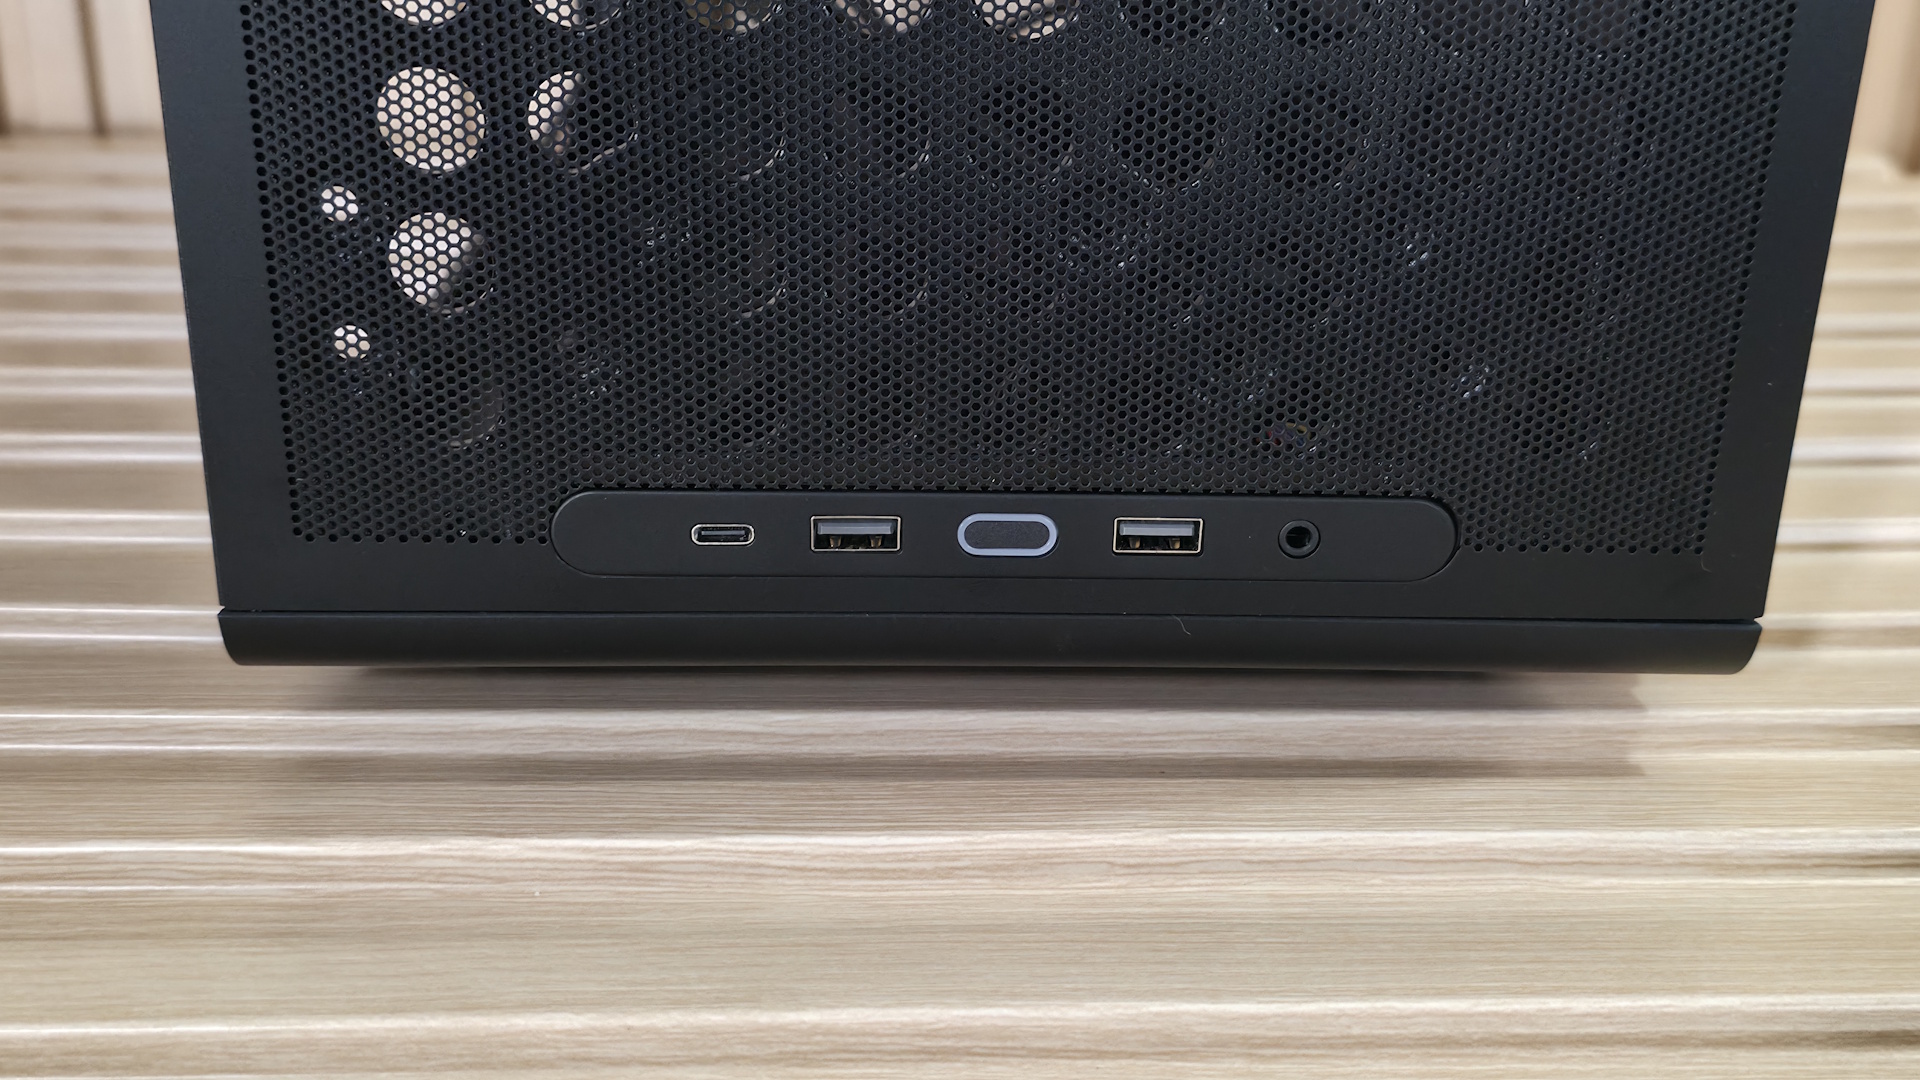
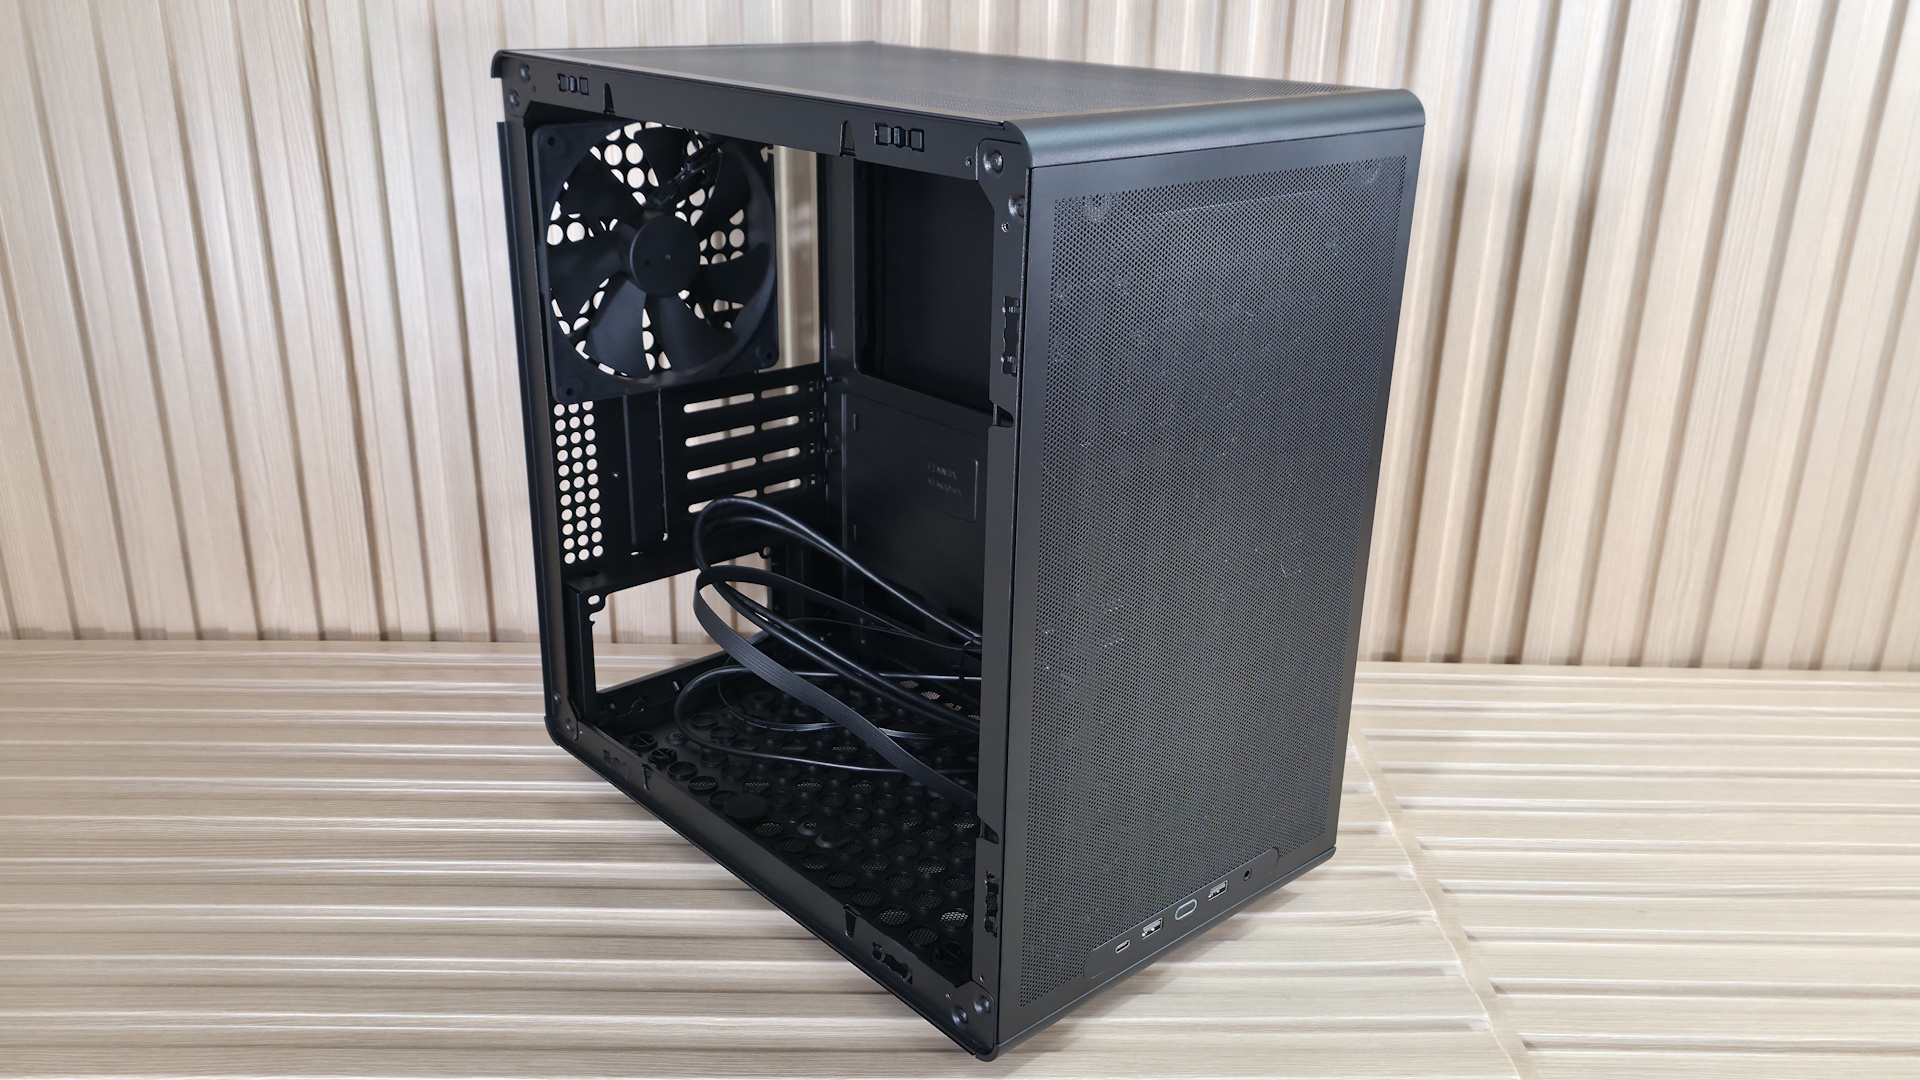
Last but certainly not least, the outside features the front IO panel on the bottom with your typical selection of ports. Starting on the left is a fast USB 3.2 Gen 2×2 (20 Gbps) Type-C port. Next are two USB 3.2 Gen 1 (5 Gbps) Type-A ports that flank the LED-lit power button. On the right is a single 3.5mm mic/audio combo jack. It’s rare to see a 20 Gbps USB port on such an inexpensive case. And if you don’t like the IO panel on the bottom (or the left when laying horizontal), you can move it to the top (or right in horizontal orientation).
▶️ Internal Features
Inside the case, there’s a fair amount of space to work in, and nothing like power supply shrouds or other cable-routing doors to get in the way. You can see a large cutout on the motherboard tray for easy access from the back; however, it doesn’t support rear-connect (think Asus BTF, Gigabyte Stealth, MSI Project Zero) boards, and it only supports Mini-ITX and Micro ATX form factors. ATX motherboards need not apply. There are plenty of rectangular, round-cornered cutouts for cable management, though none have any grommets; I wouldn’t expect that at this price, either.
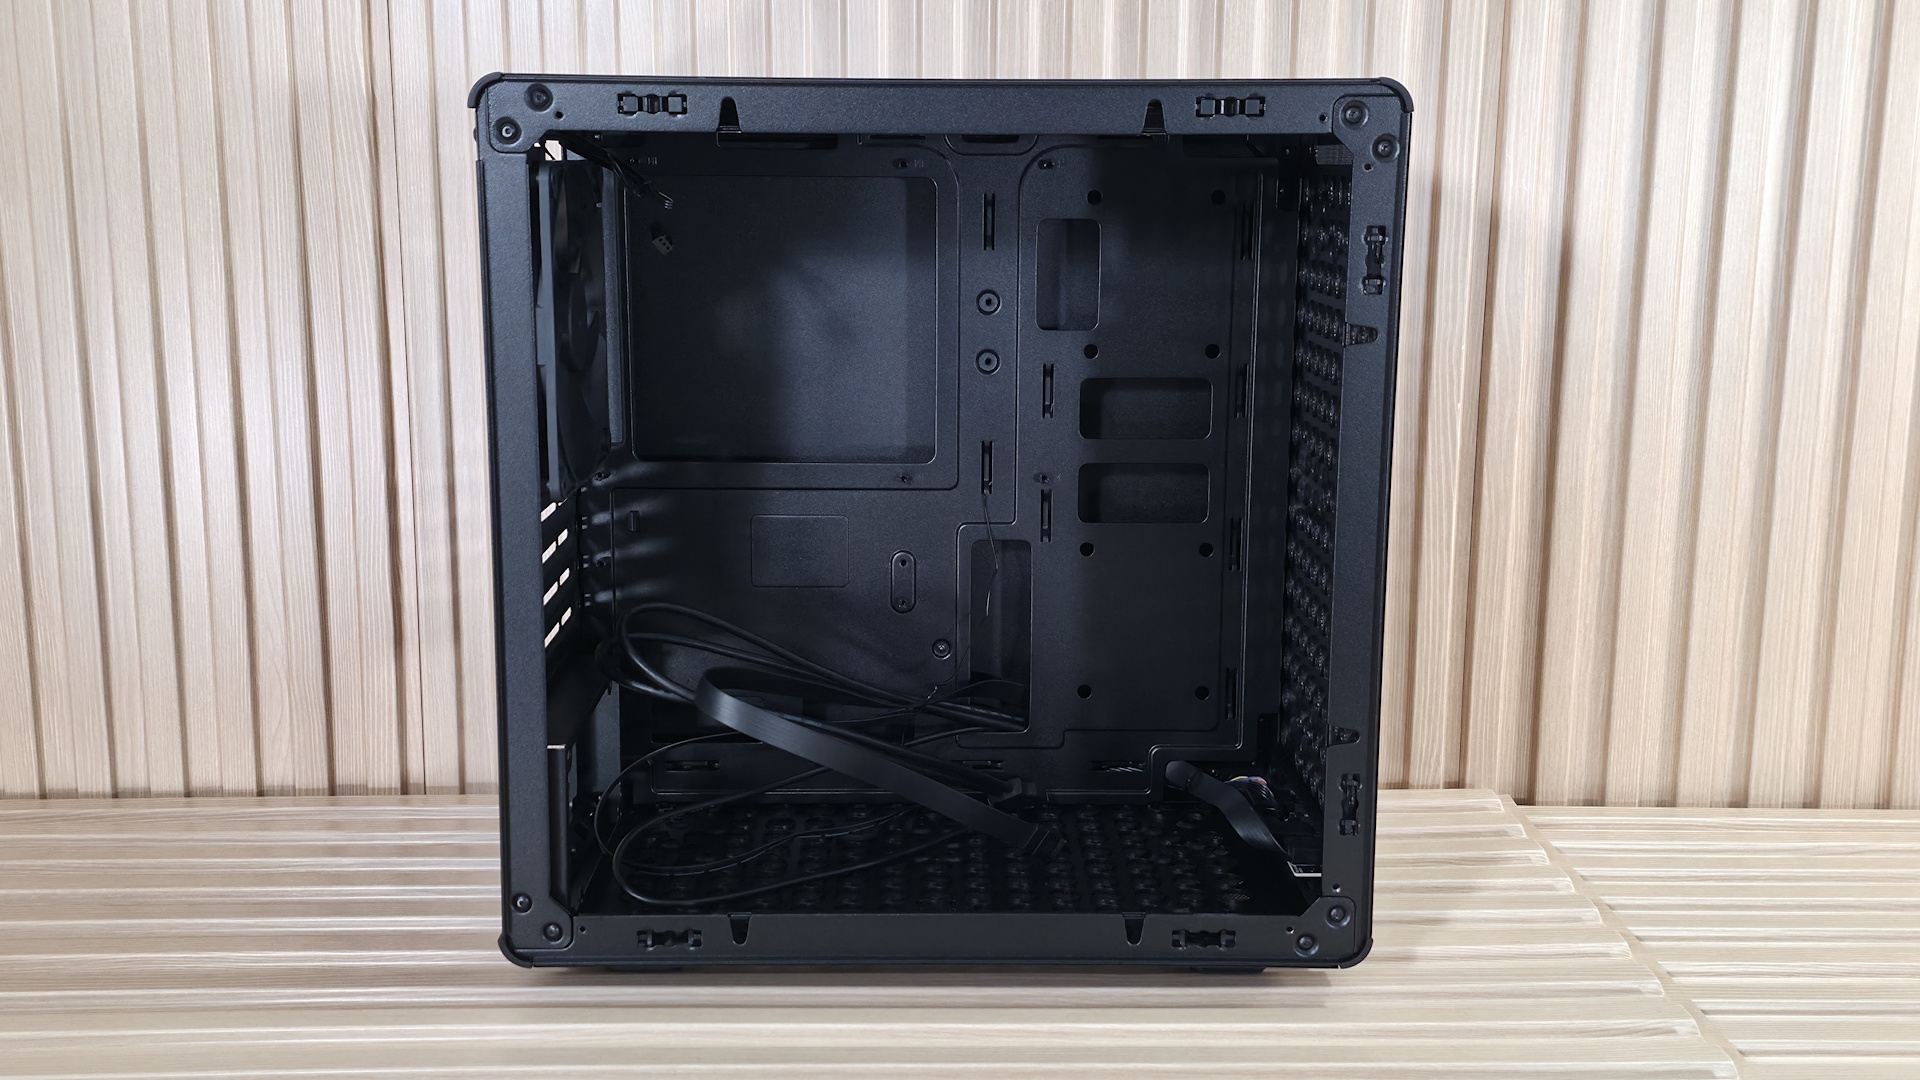
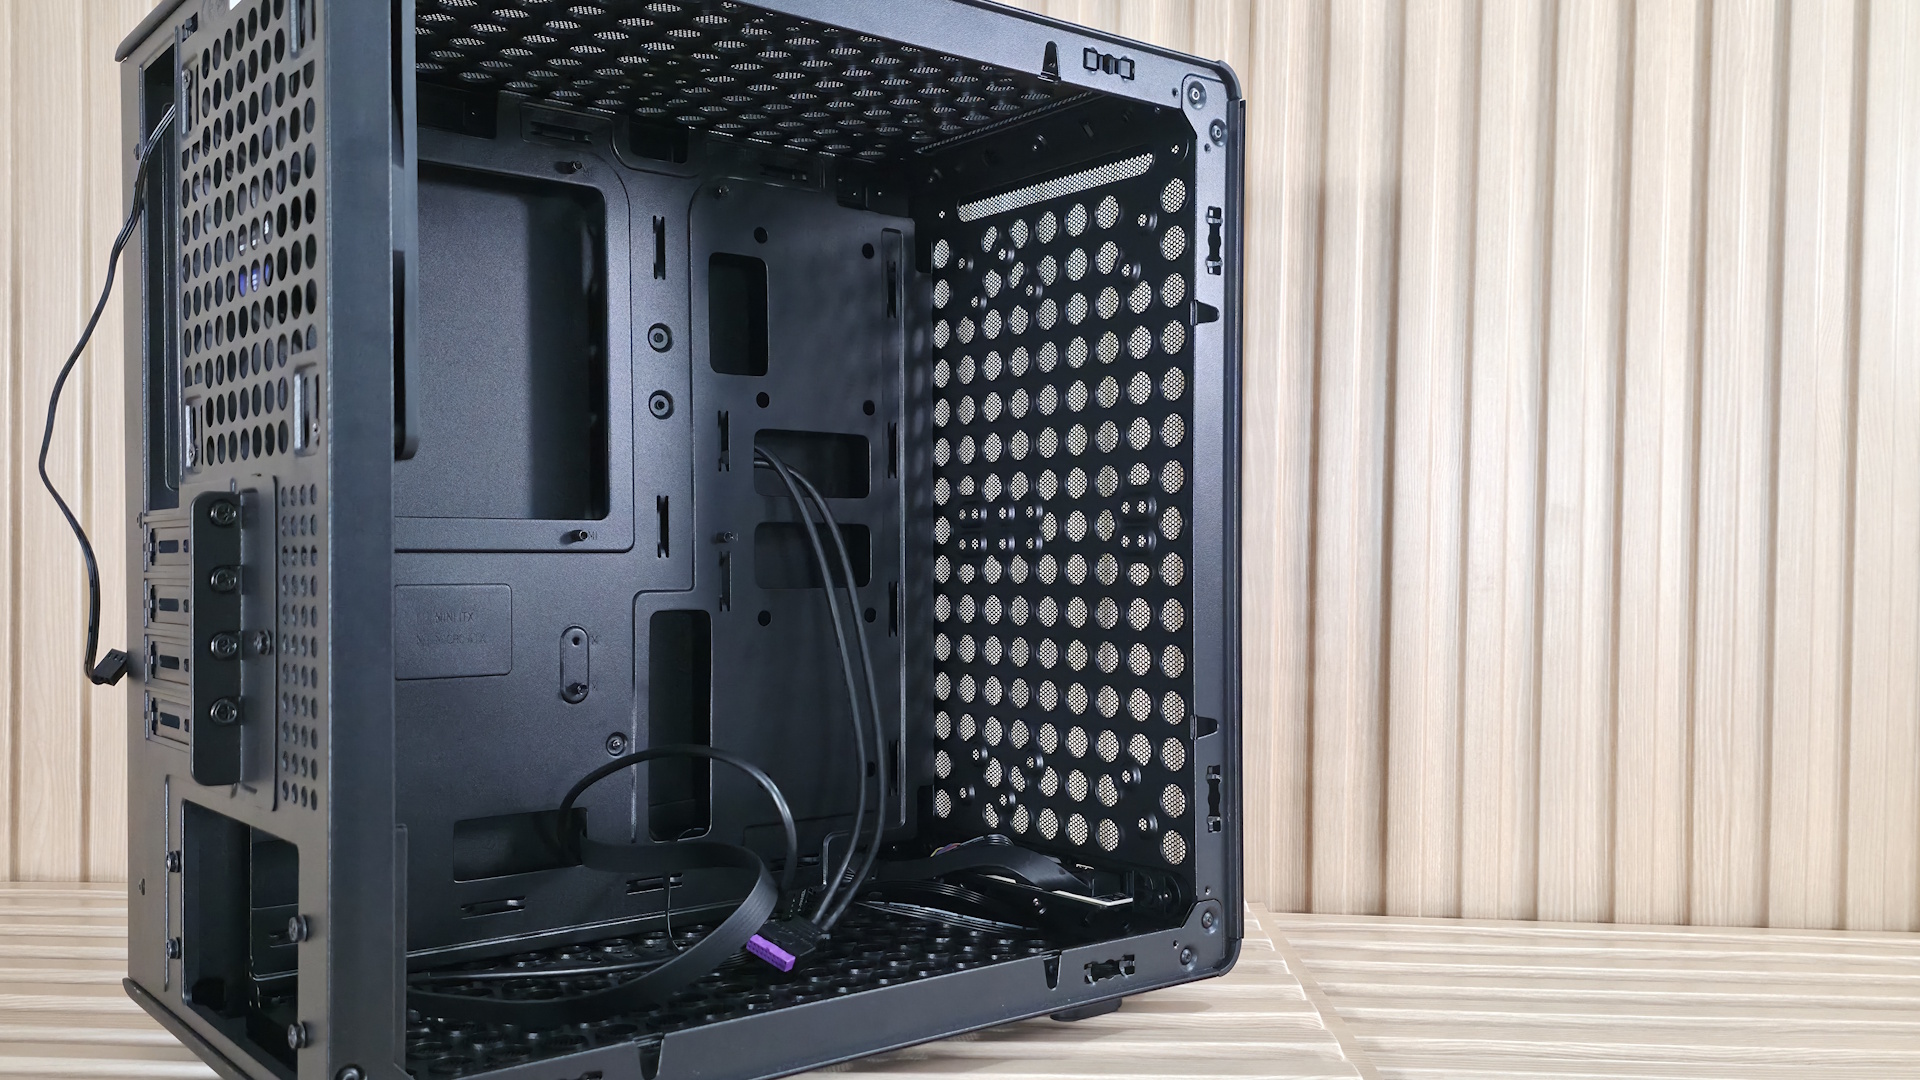
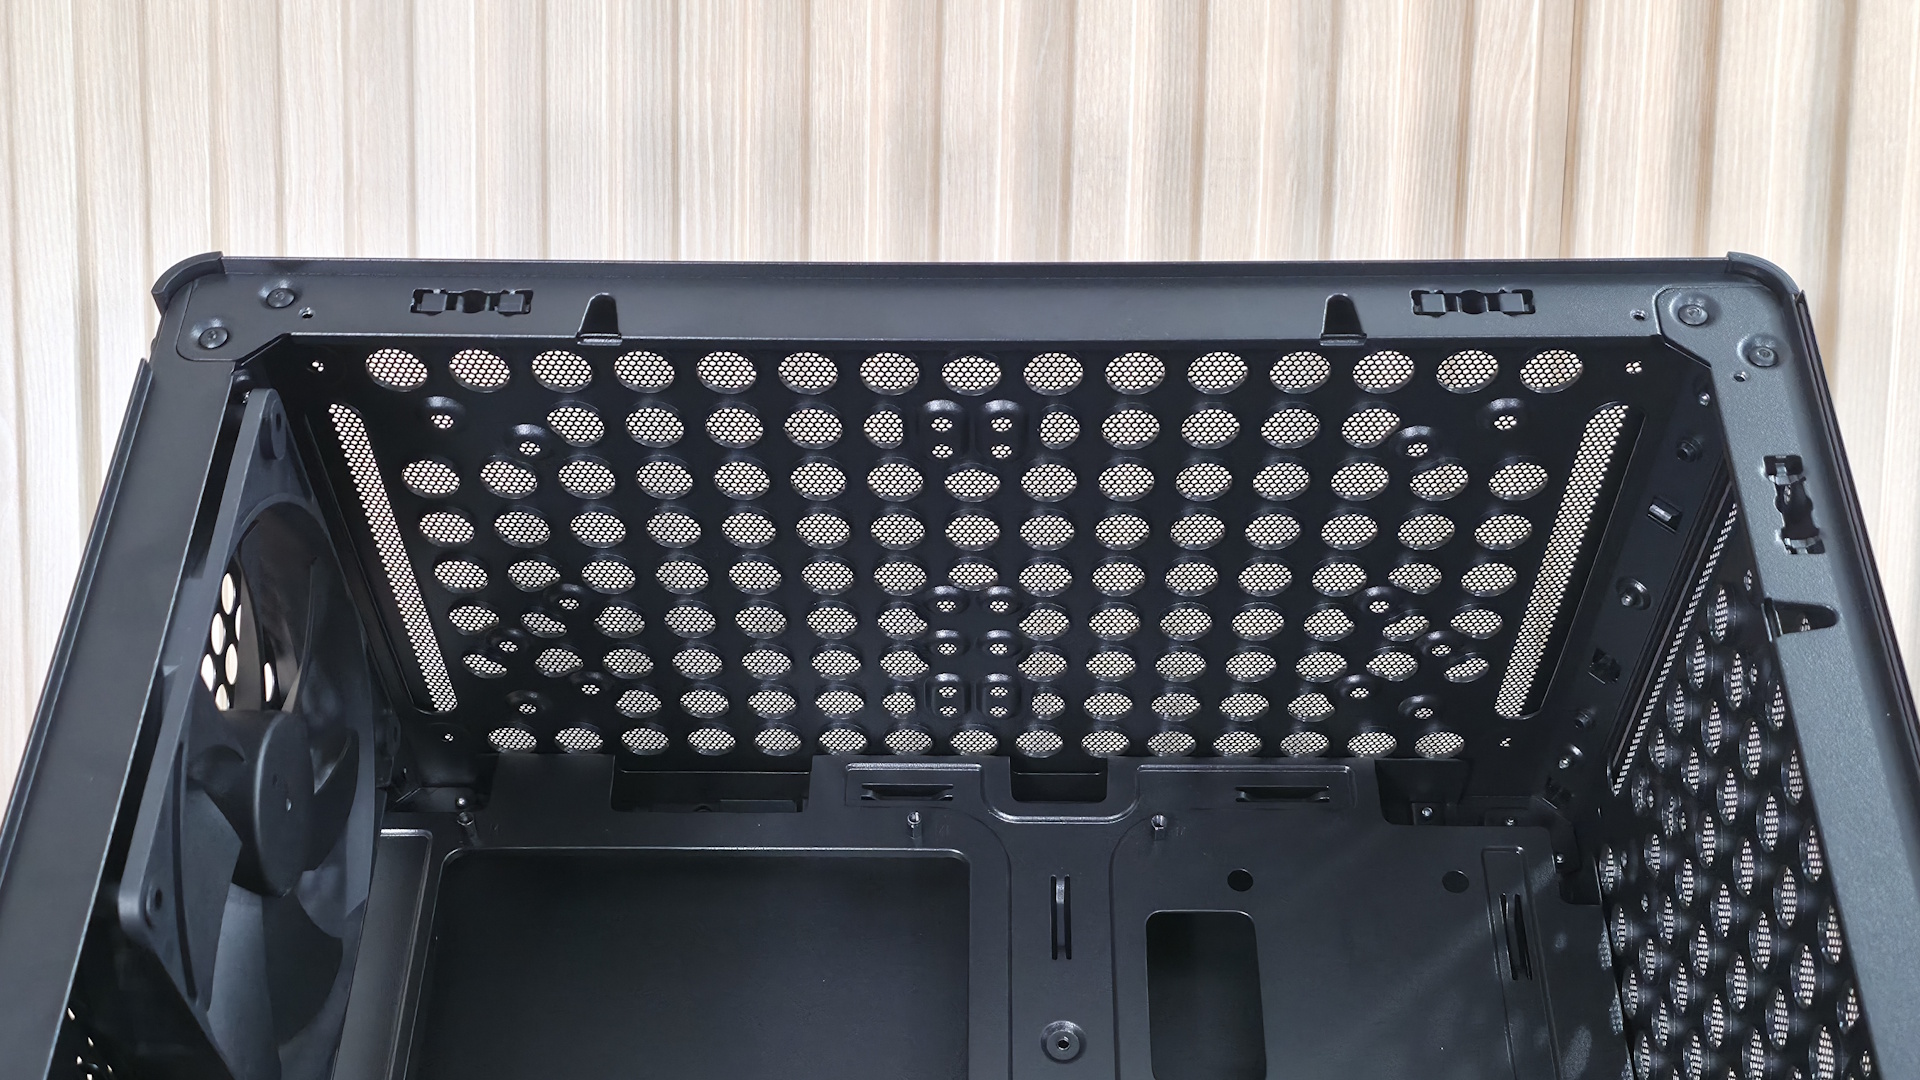
At the front we spy the enlarged holes for airflow, and you can see the mounting location for 2×120/140mm fans/radiators. GPU clearance is 366mm without any fans. This fits an RTX 4080 FE, but our RTX 4080 TUF was too long. If you add fans, or fans and a radiator, that number shrinks, so be careful when choosing what you’re going to put up front versus the length of your video card.
On top, we again get a good look at the airflow holes and the mounting locations for the 2×120/140mm fans/radiator that fit here. There’s very little space above the motherboard, and a fan/radiator combination easily overhangs the motherboard/top VRM heatsink. So, to fit fans and a radiator, Cooler Master offset the mounts away from the motherboard and closer to the tempered glass window side. A fan and radiator combination will absolutely overhang the top edge of the motherboard and top VRM heatsink.
On the back rear, we see the pre-installed Cooler Master 140mm (DF1402512RFLN) fan. The OEM fan spins from 650 to 1,400 RPM, using up to 0.24A (~3 W). I can’t find any dBA ratings for it, but I can tell you it does a good job cooling in our noise-normalized testing. That said, it does get louder than other cases I’ve tested at 100%, even with the additional MasterFan M120. Below that are the four PCIe expansion slots, secured by screws and a ‘cap’ that goes on top.
On the bottom, we get a better look at the ‘box’ the power supply mounts to, as well as the enlarged airflow holes. Just be aware that the power supply isn’t in its own chamber or hidden under a shroud. Once you install it and connect everything, you will see the initial few inches of cables coming out of the PSU, though you can hide the rest nicely in the space behind the motherboard baffle between the other side (or bottom) panel.
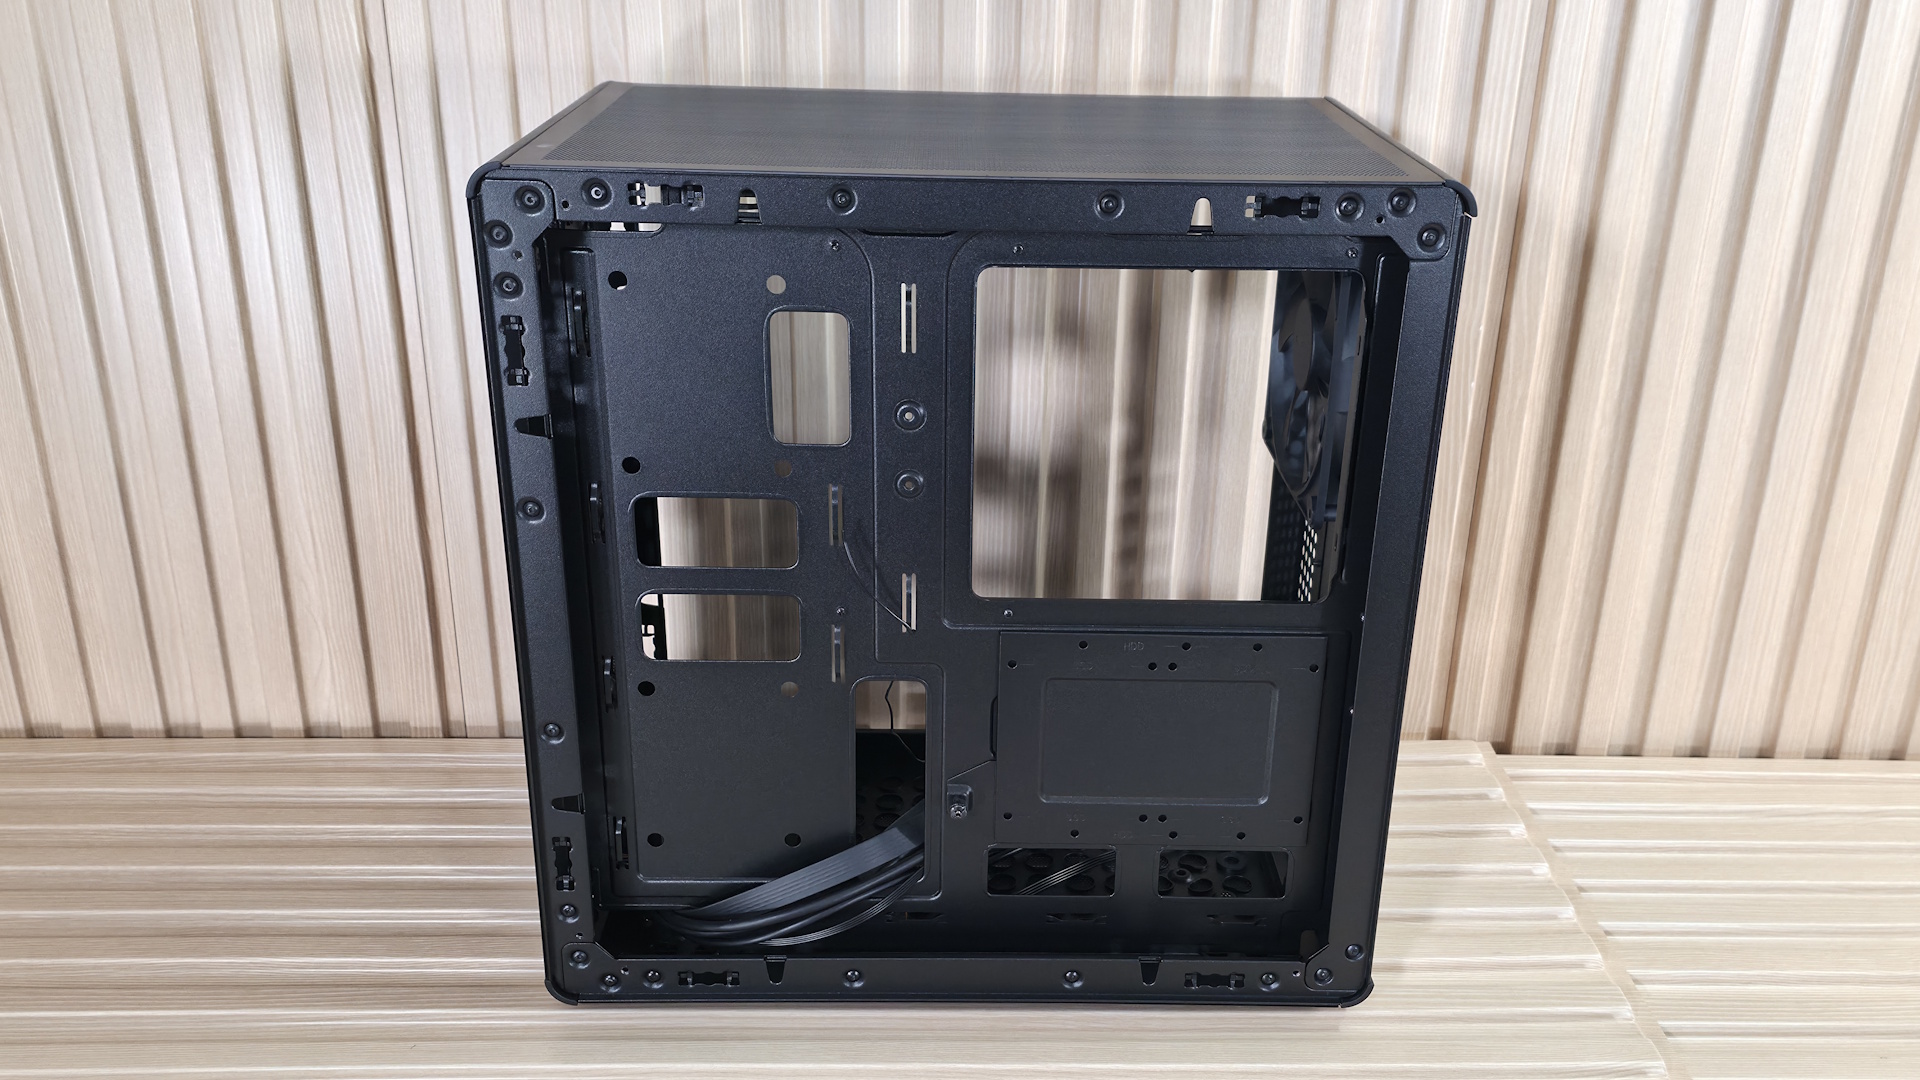
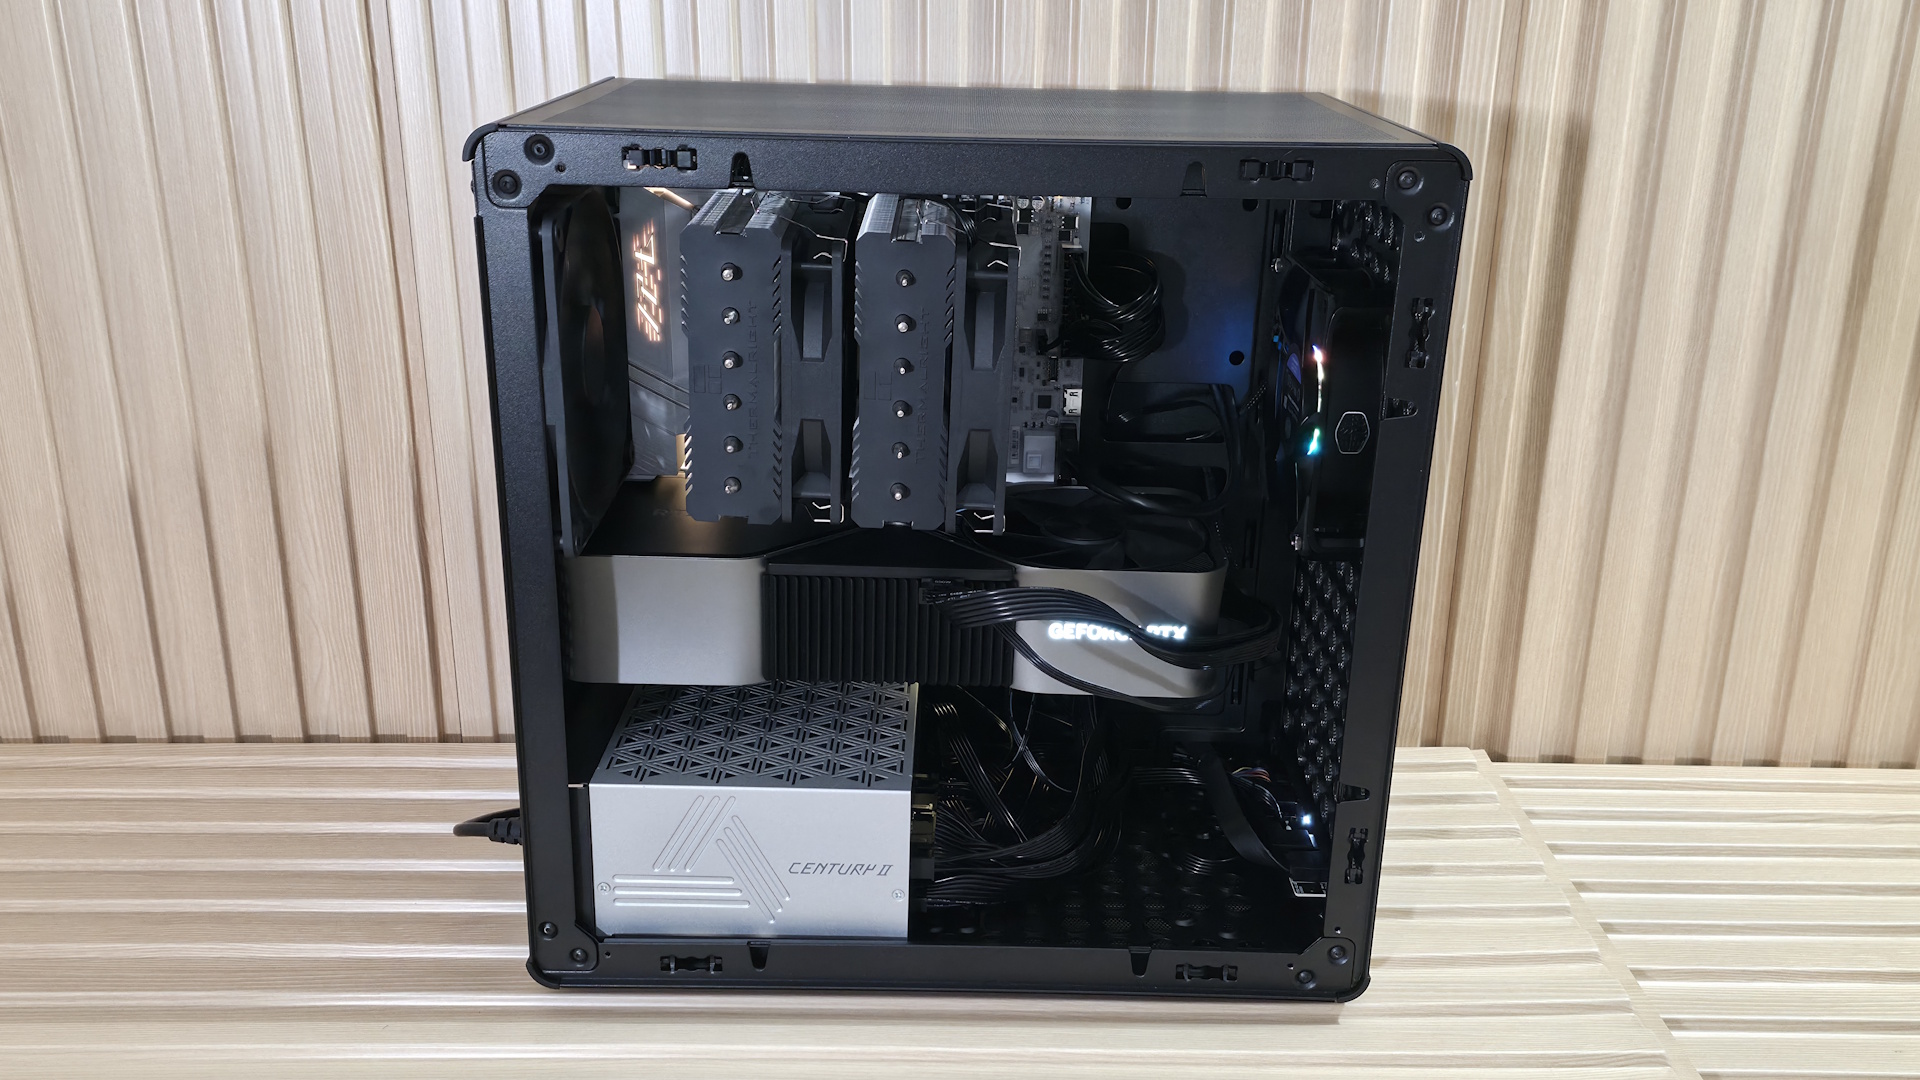
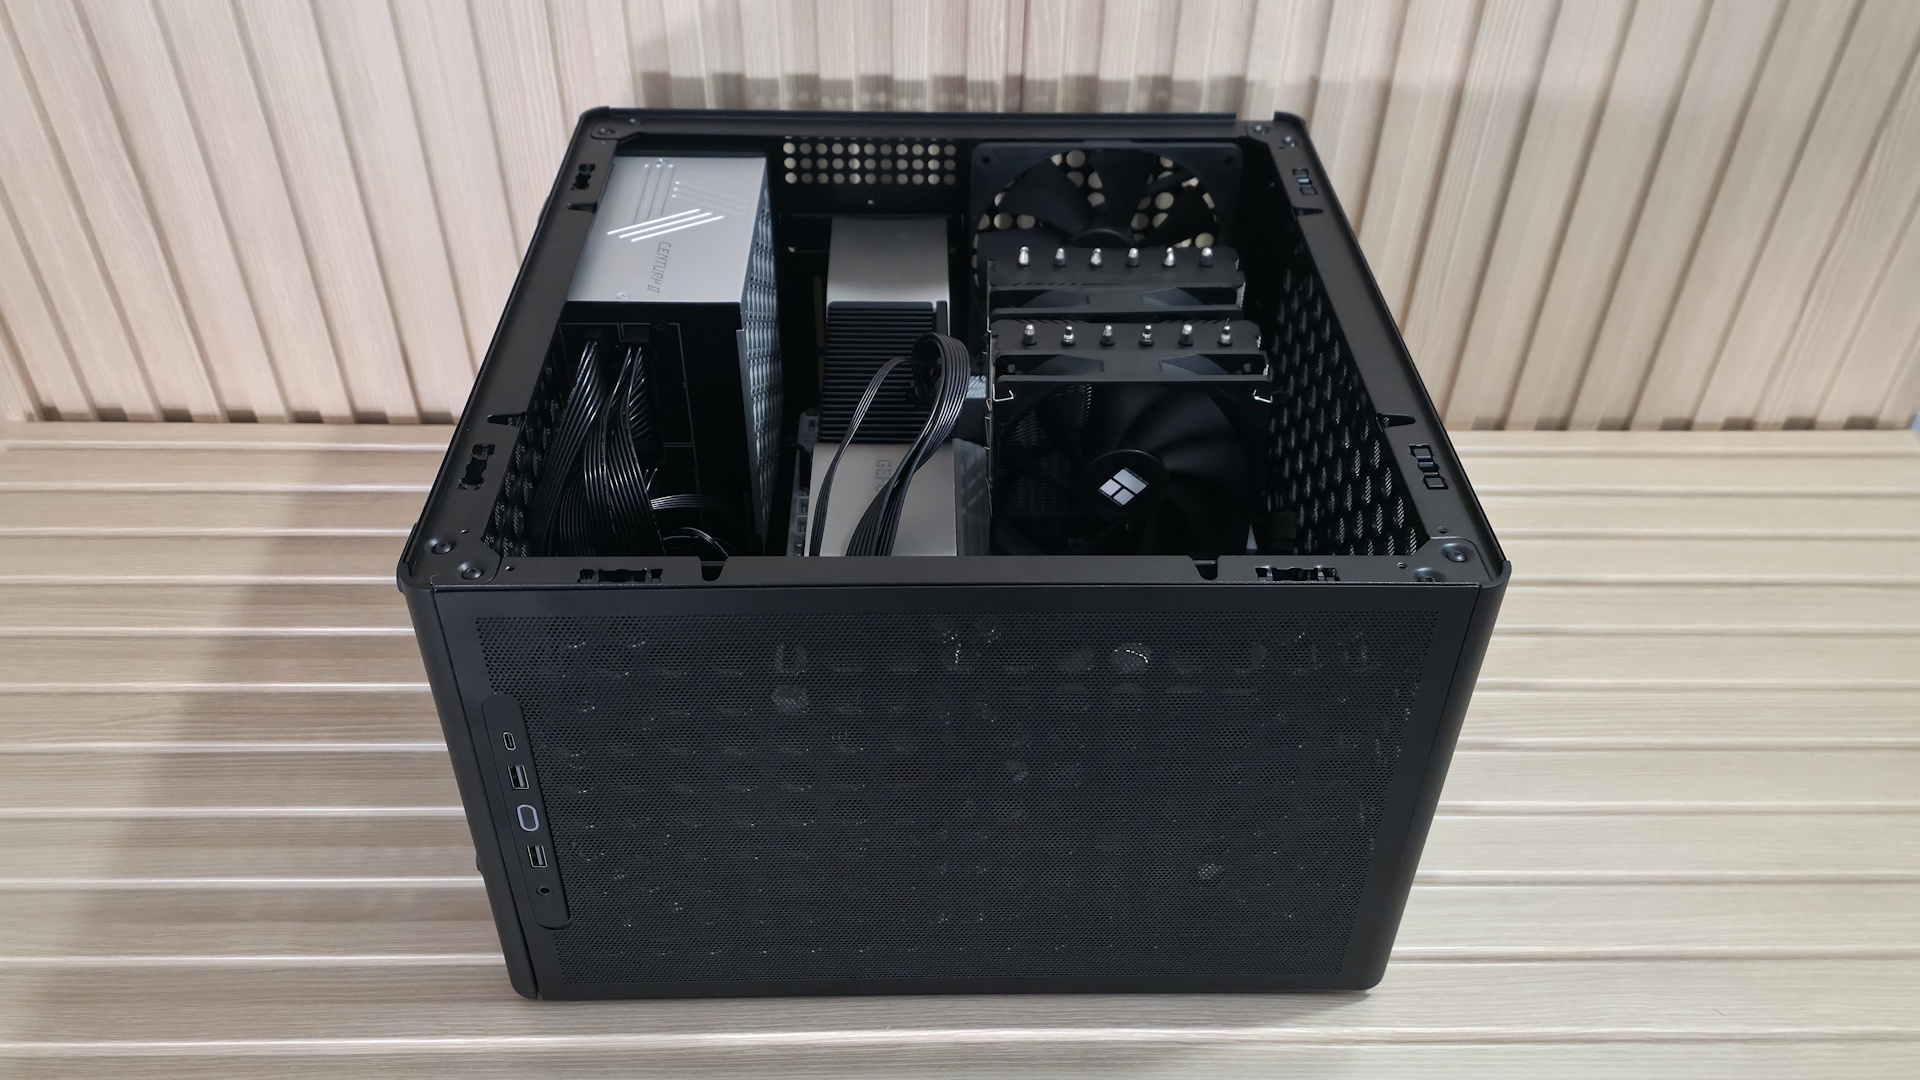
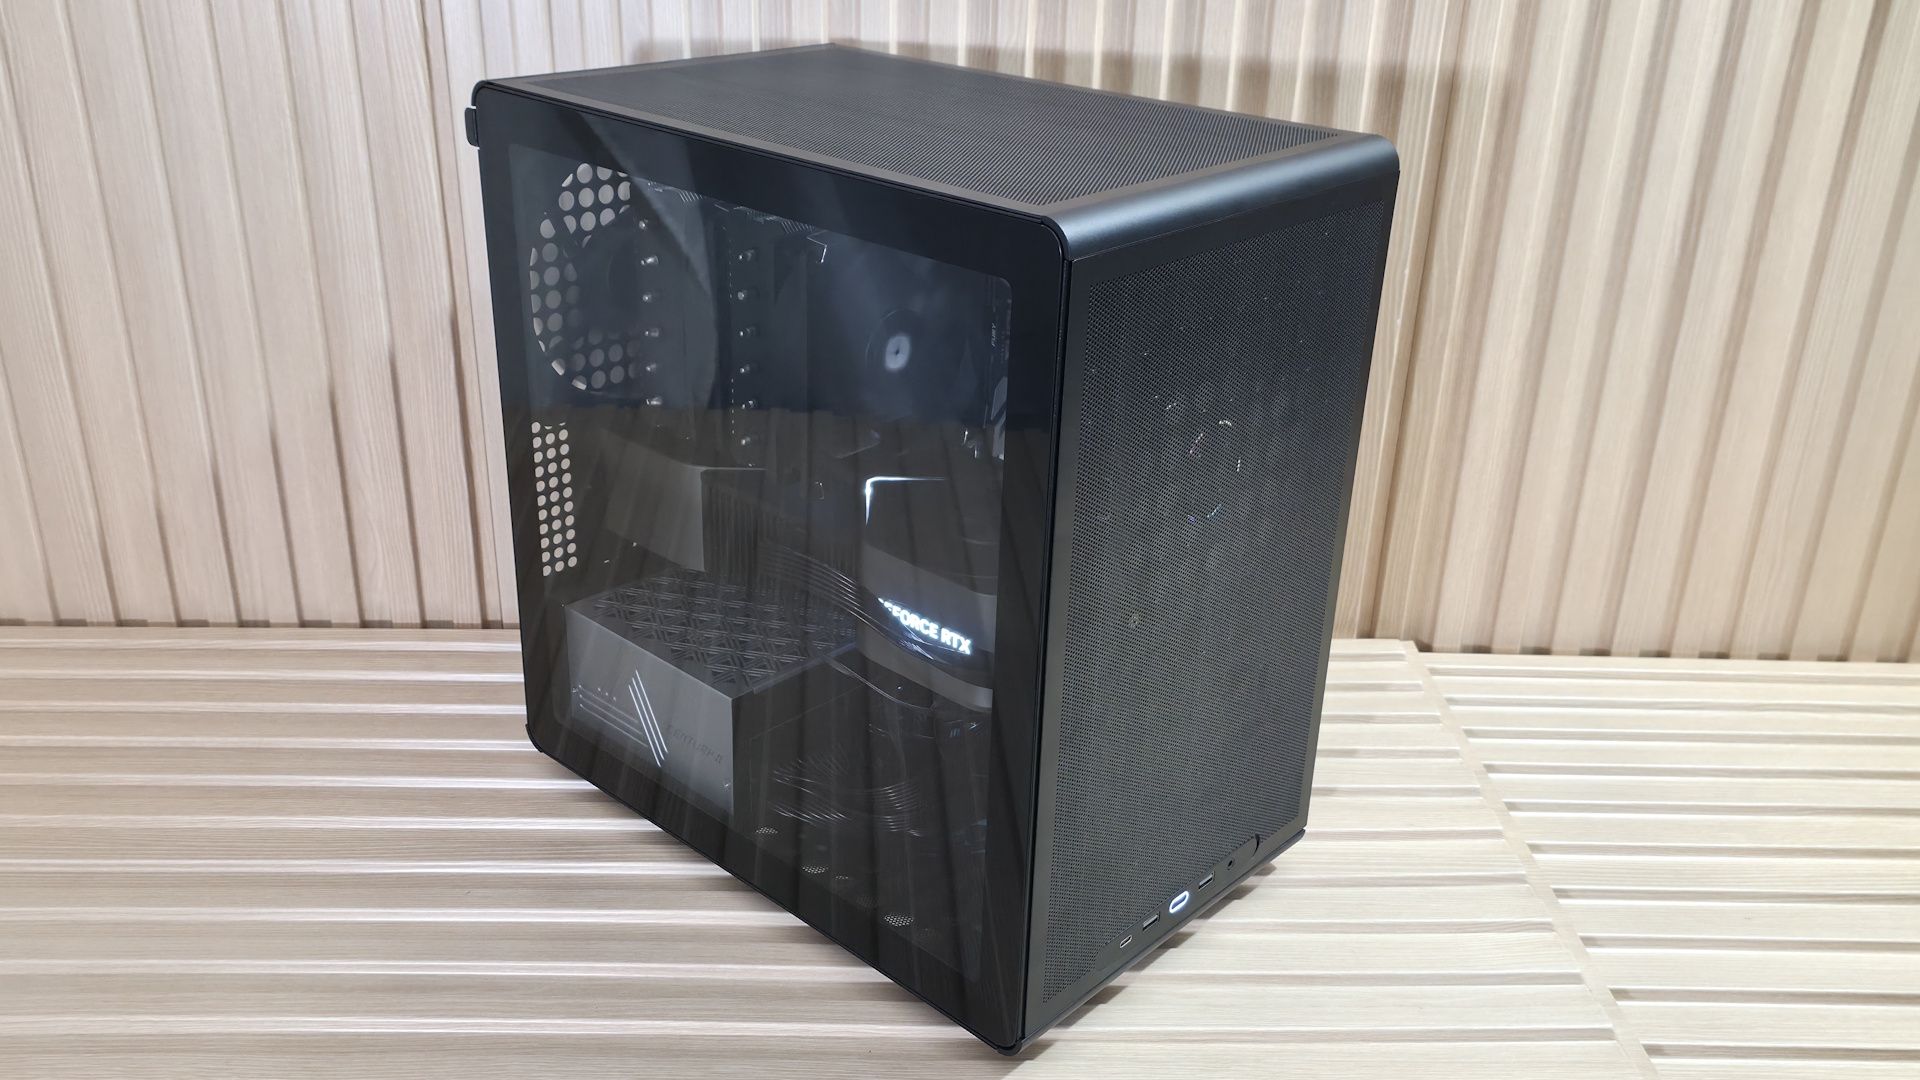
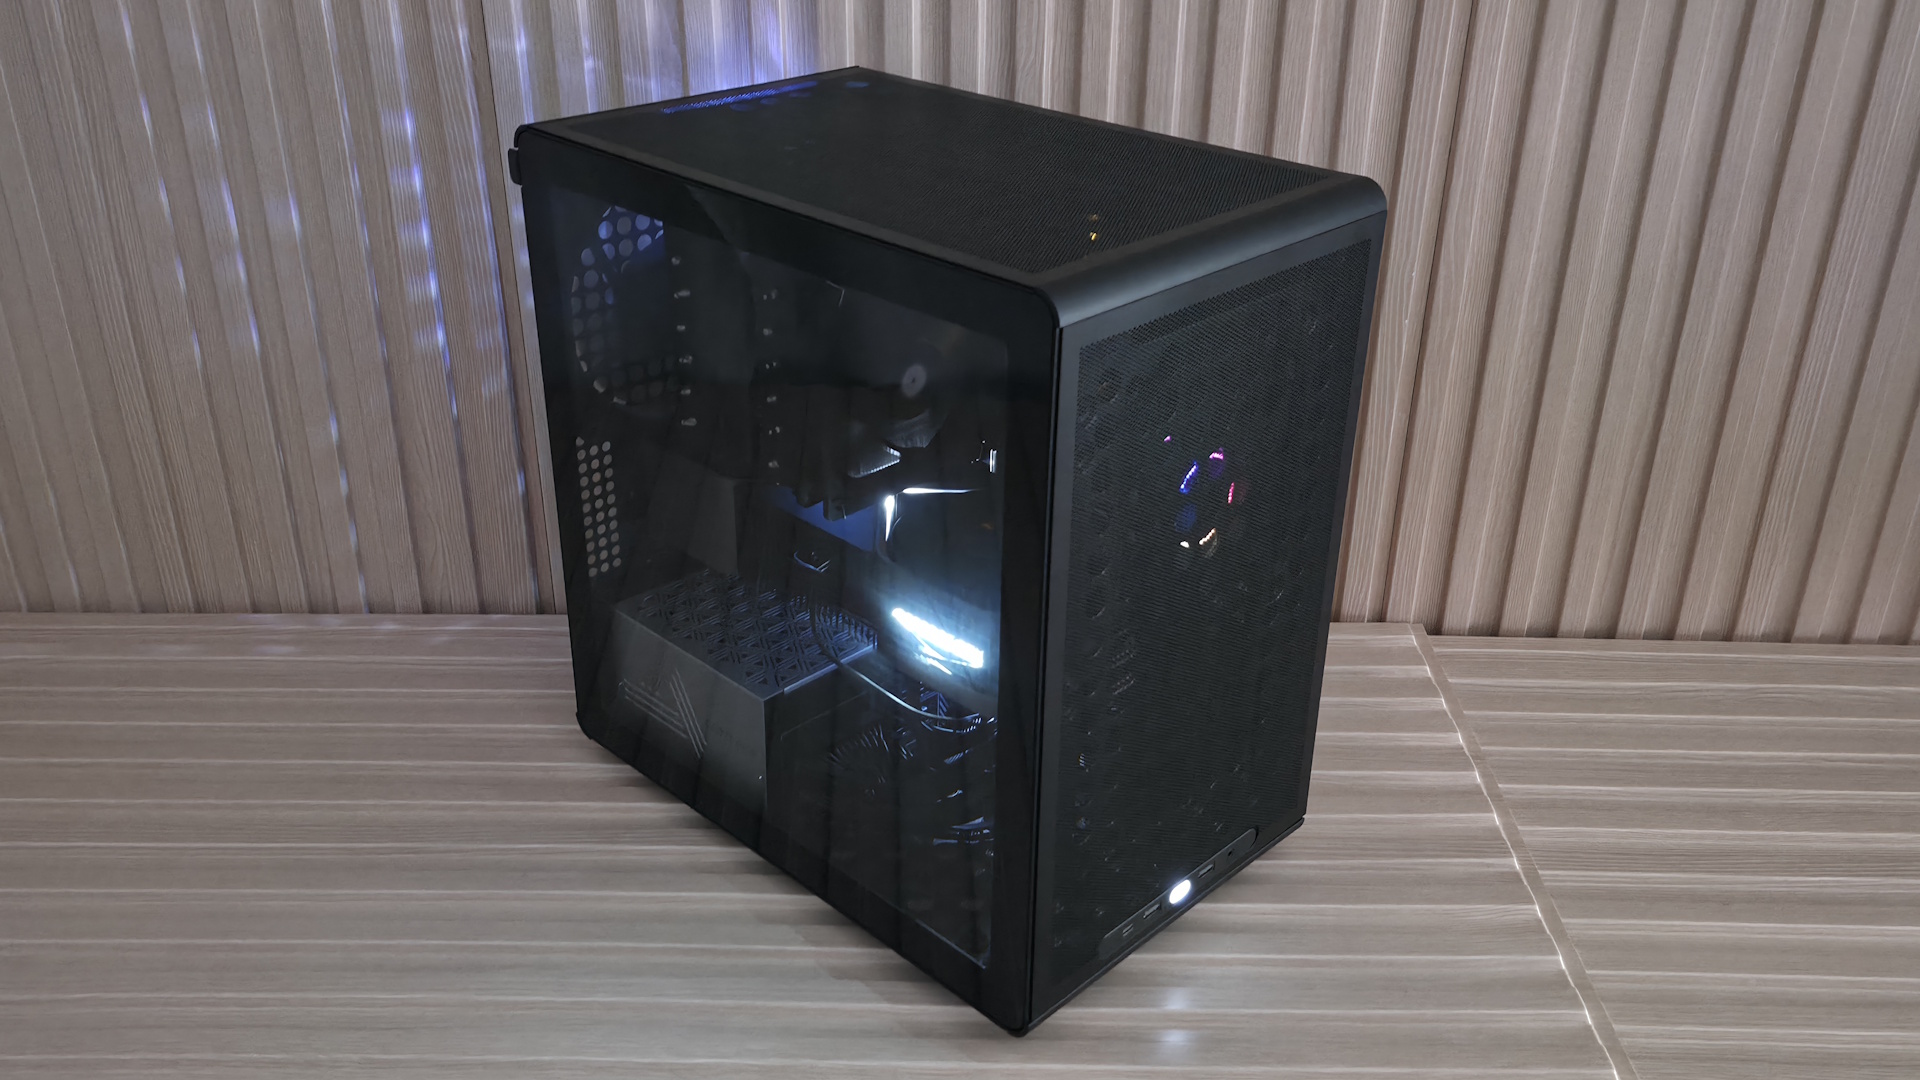
Flipping the case around to expose the other side, we see ample room to store cables (30 mm) and the drive mounting locations. The Q300L V3 also has multiple tie-down locations and includes a few zip ties to help tidy the wires. At the bottom right, above the two holes for cable routing, you can mount a single 3.5-inch HDD or two 2.5-inch HDDs/SSDs.
You can easily see your components inside through the non-tinted tempered glass window. Once we put our PC together, it looked fairly clean, even though we could see the cables coming out of the power supply. A tinted glass panel would look better and hide some of the inevitable visible wires for this class chassis. But for a case with an MSRP under $45, you can’t expect to hide everything.
Test equipment, method, and results
|
CPU |
Intel Core Ultra 7 270K Plus |
|
CPU Cooler |
Thermalright Peerless Assassin 120 SE |
|
System Fans |
Pre-installed (if needed, Cooler Master Masterfan M120) |
|
Motherboard |
Gigabyte Z890 Aorus Elite Wifi7 Plus |
|
GPU |
Asus TUF RTX 4080 |
|
PSU |
Montech Century II 1050W |
Our thermal tests are presented to give you more information about the product’s performance, but aren’t intended as the sole basis for judging the chassis. The style, price, features, and noise levels of a case should also be considered, and we all have different preferences. What I might like in a case, you might not, and that’s OK. Our goal with these reviews is to give everyone, regardless of their preferences, enough information to decide whether a case is right for them.
To get heat into the system, we stress the CPU with Cinebench R26 (multi-threaded test) and the video card with Furmark 2 (1080p). CPU and GPU tests run concurrently for 30 minutes, allowing the air-cooled system to reach saturation and stabilize over that period. We then let the system idle for 15 minutes, adjust the fans to 100%, and test again.
Noise-normalized (42dBA) Maximum thermal Performance
This set of tests is designed to appeal to those who love quiet PCs, with both system fans and the CPU fan noise normalized to 42 dBA. Consider this a measure of the case’s thermal efficiency when noise levels are set to run quietly. It is audible, but just (at least for my old ears).
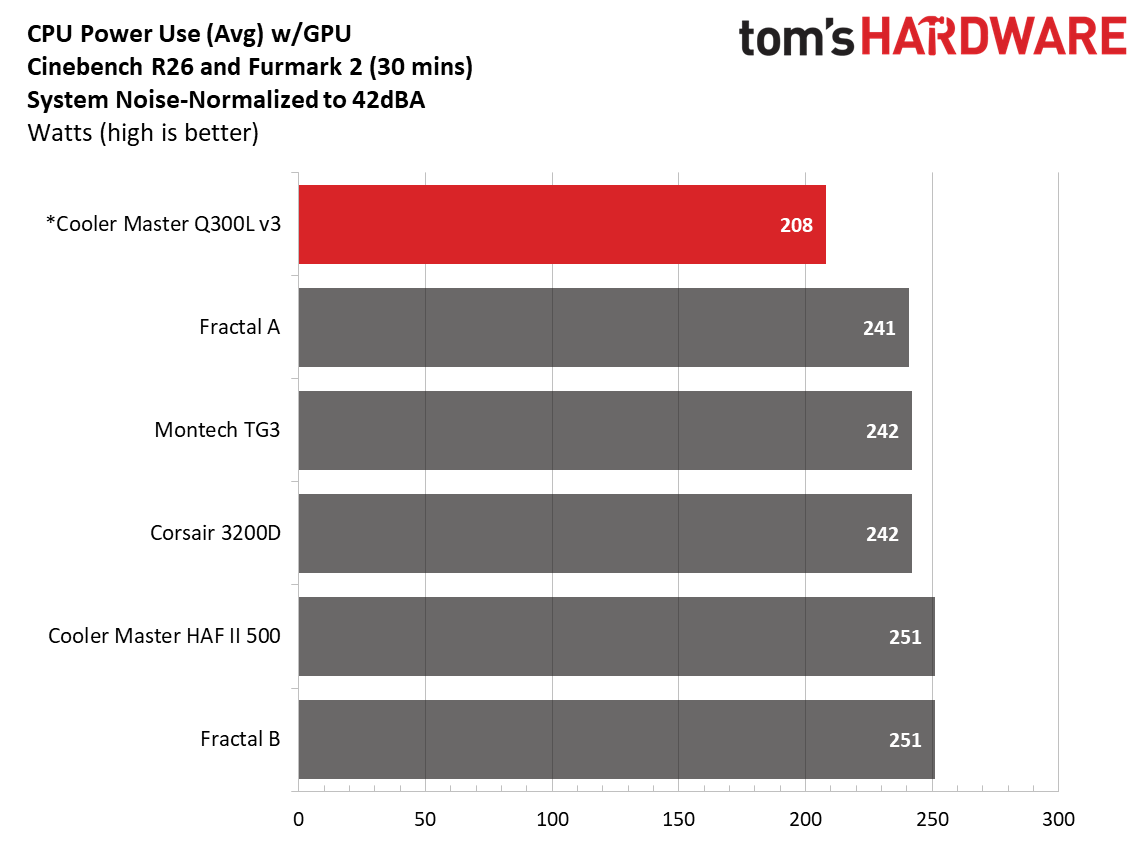
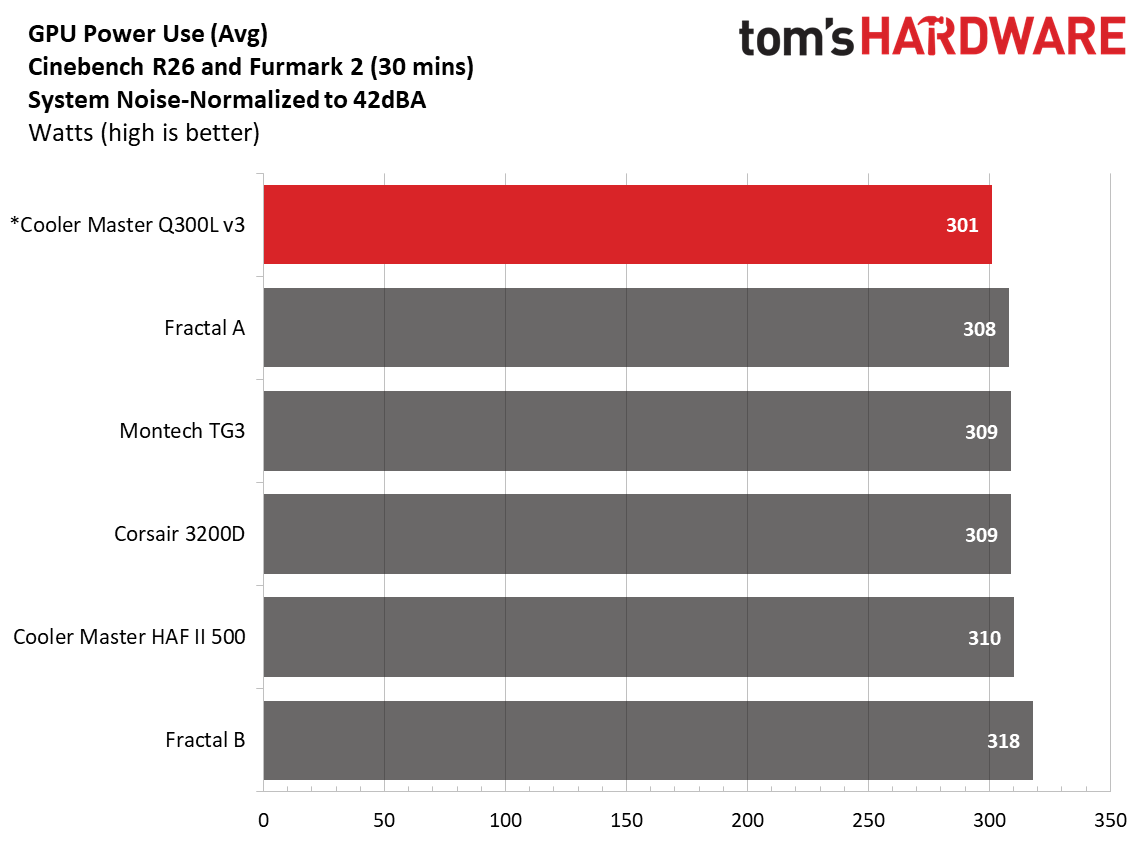
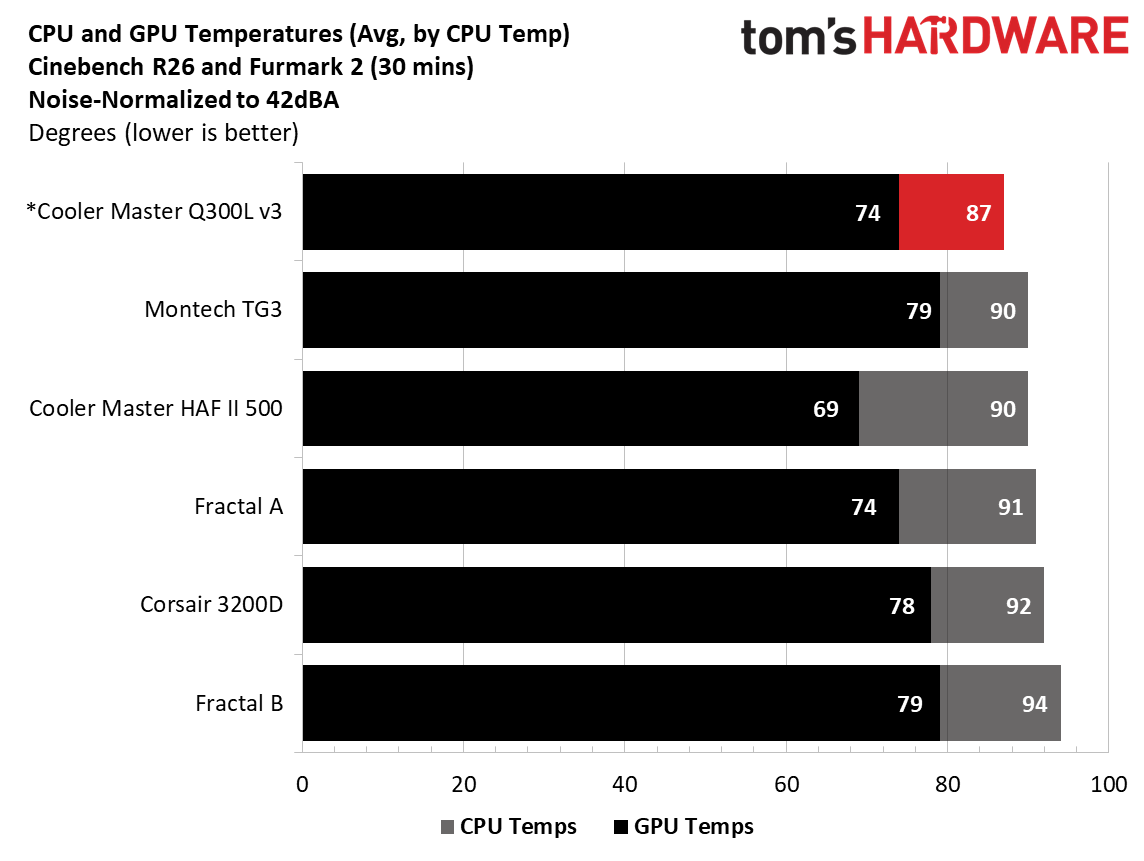
One thing we have to mention before you see the results of our testing is that we had to use a different video card for this chassis. The one we normally use, the Asus TUF RTX 4080, was far too long for the Q300L V3, so we used a shorter RTX 4080 FE instead. Another difference is that the motherboard we used limited power to around 210W. It wasn’t throttling; it was set to Intel’s default Performance setting like the ATX Gigabyte board, but still settled at much lower power use. With a different cooling solution and a different motherboard in this smaller build, you can’t compare these results directly to the existing data from the other hardware.
That said, the case kept our CPU at around 87 degrees Celsius with a two-fan configuration after adding a Masterfan M120 ARGB fan to the top front fan location. This is obviously cooler than the other results, but again, those systems pulled around 30 more watts, which would have raised these temperatures. The video card averaged 74 degrees throughout. Ideally, you’ll have two front fans and two top fans (or an AIO) to move more air through the case, and temperatures would improve. The temps here aren’t bad, but we’re only using two case fans – and the case only ships with one exhaust.
Maximum thermal performance – fans at full speed
Our noise-normalized results are designed for folks who prefer silence, but what if you don’t mind additional noise and just care about maximum performance, or maybe you have to run things at high settings to keep high-powered devices cool? This testing is for you. Obviously, when you add fans or an AIO up top, things will change a bit, but this gives you a great idea of ‘out-of-the-box’ performance, noise be damned.
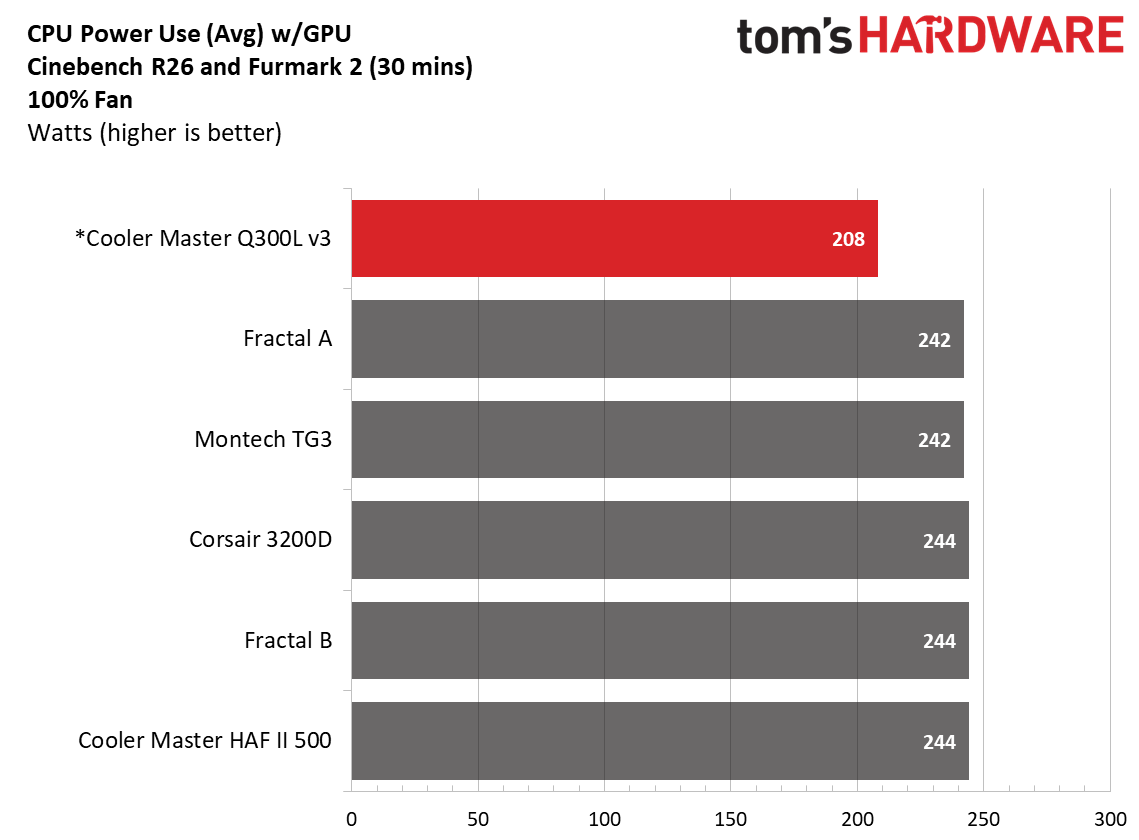
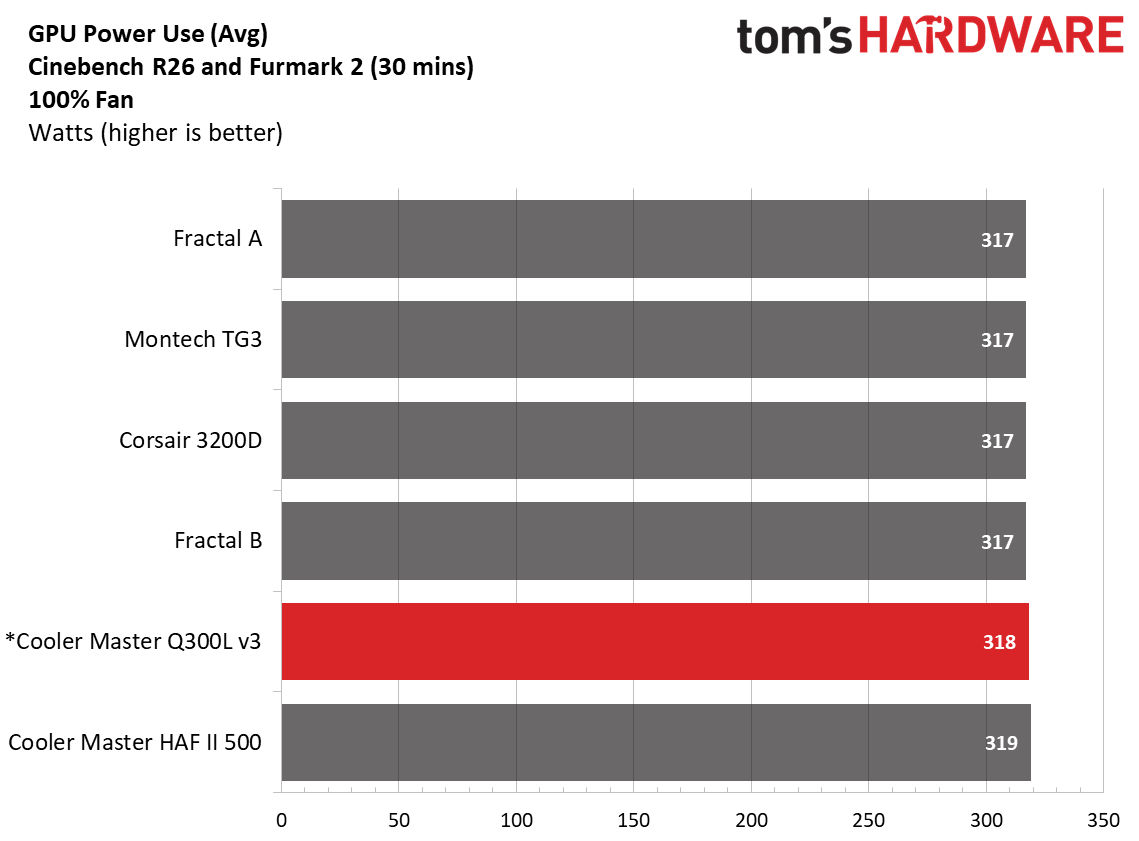
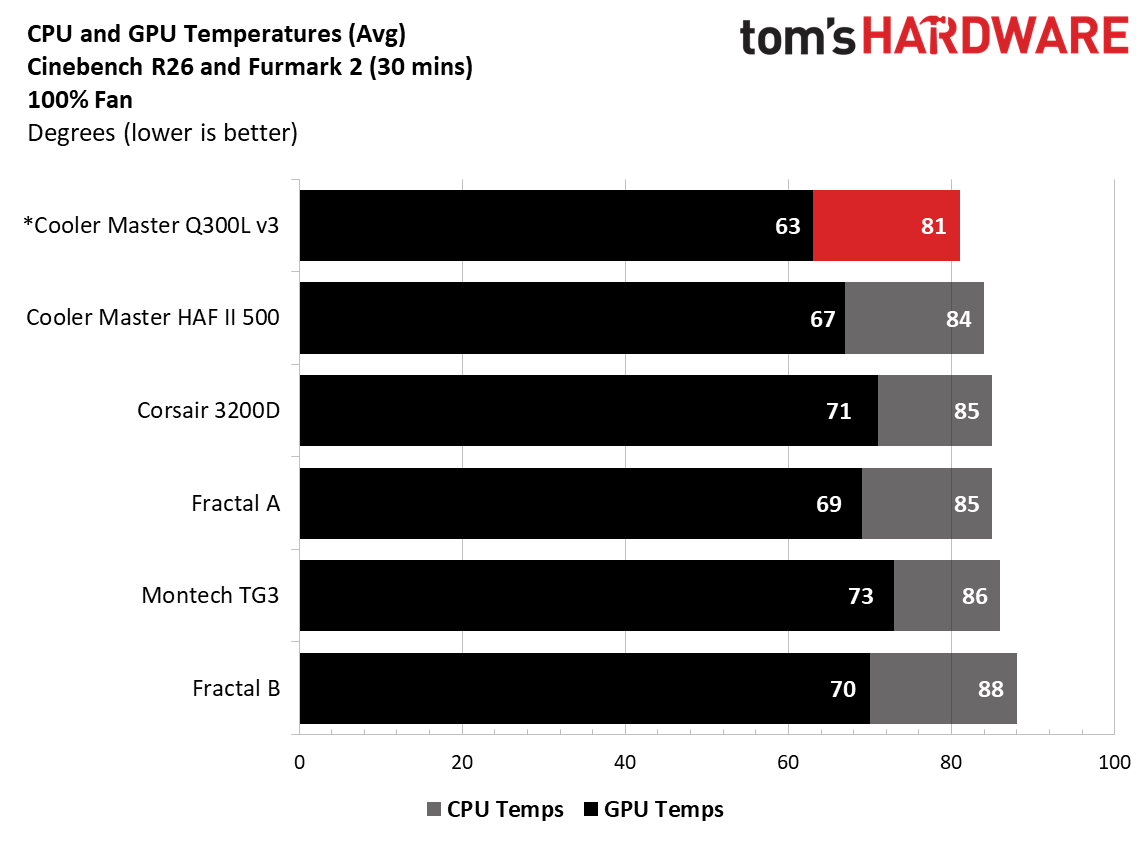
Once we set all the fans to 100%, temperatures dropped significantly across the board, with the CPU averaging 81 degrees Celsius and the video card at a low 63 degrees. There’s a fair amount of headroom for cooling in this smaller chassis. I’d personally make sure all available fan slots are populated.
Maximum Noise Levels
We measure the noise levels with a sound meter from one meter away from the computer case, with the pre-installed fans running at their maximum RPM. If a case does not have enough included fans for airflow (intake and exhaust) as configured, we add a Cooler Master M120 ARGB, since we expect most users will add at least one more fan in situations like these.
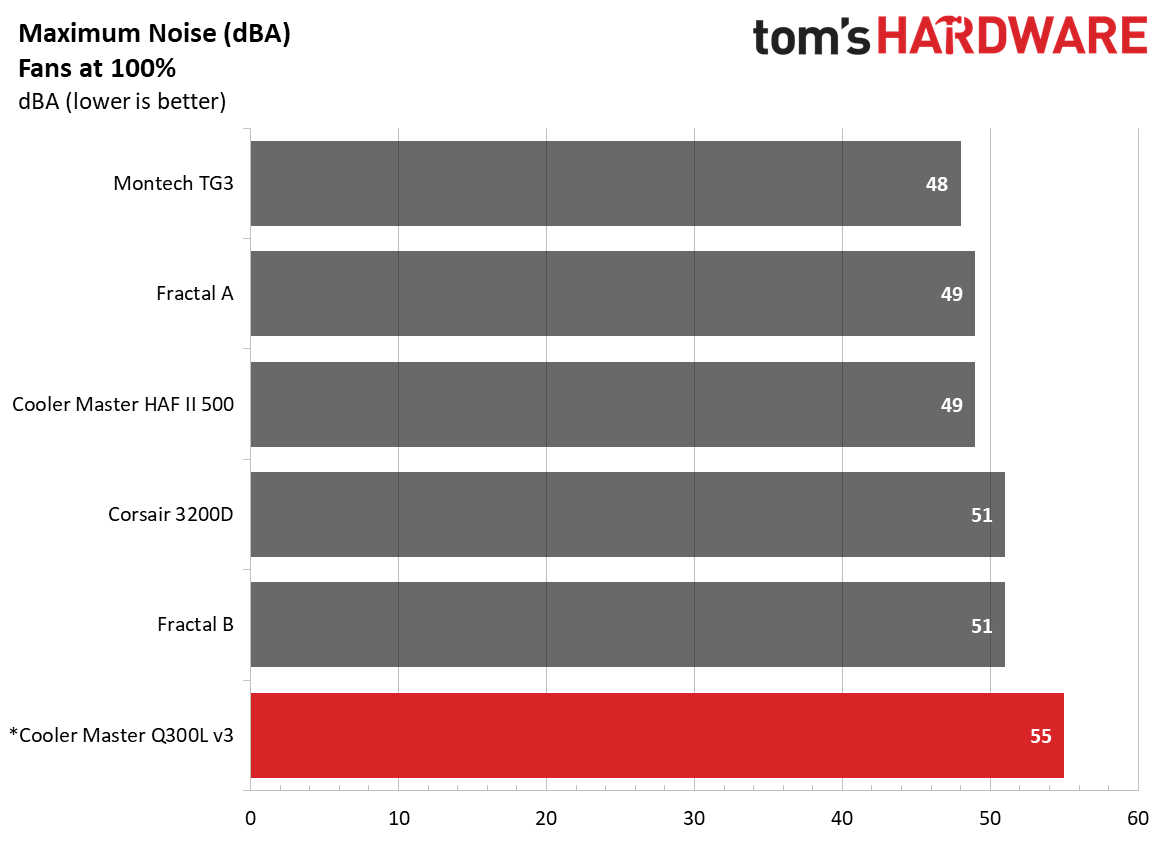
When we cranked the included fan (and the Masterfan M120) to 100%, the case did get loud, sitting around 55 dBA, the highest we’ve tested so far. The OEM 140mm fan on the rear certainly made itself known at its 1,400 RPM maximum, as we know neither the Masterfan M120 nor the Thermaltake fans did that on any machine previously.
Conclusion
At a time when building a PC has become cost-prohibitive for many people, it’s nice to see companies focusing on the budget side of things. With an MSRP under $45 and a current price under $40, the Q300L V3 small form factor chassis is one of those items. The new V3 chassis improves things all around, with increased airflow potential via enlarged front-panel perforations, room for larger hardware, a stronger chassis with an upgraded motherboard tray, and reinforced fan mounts, which Cooler Master hopes will make for a refined building experience. A modern front IO with three USB ports, including one 20 Gbps Type-C, offers access to high-speed connectivity, a rarity in budget-friendly chassis.
That said, I’d like to see a front fan included, even if it pushes the MSRP a few dollars higher and the included fan gets loud at 100%. The good news is that performance was fine in our noise-normalized results at much slower speeds. I’d also like to see a couple of Velcro tie-downs to help with wire management behind the motherboard tray. But the list of complaints is small, especially given that the case is currently $39.98. In fact, we like the Q300L V3 so much that it made our Best Cases list as the Best Budget Micro ATX chassis. If you’re in the market for a budget case for a Micro ATX build, Cooler Master’s Q300L V3 should be at the top of your options list, as it’s easy to build in and has all the basics you need for a small-form-factor PC build.